User Review
( votes)For designing any application for Dynamics 365 CRM that is not a web resource but rather a standalone application, the first thing that is required is designing an interface to accept details to connect with Dynamics 365.
Back in the old days, we used to include a couple of text boxes for user id and password and the domain usually was North American Data Center or a few others that were available back then. Since then however much has changed, data centers have been added, there are different methodologies to connect as well. With the enhancements in mind, it is no longer advisable to design your own interface for login control but rather use the one that has been thoughtfully provided as part of the Dynamics 365 CRM SDK assemblies.
Let us look at how we could add this within our application and leverage its functionality to easily get a connection object for CRM that we could use further on in our application. Using this method, we do not have to bother about implementing the logic for establishing control it is already taken care of by the control.
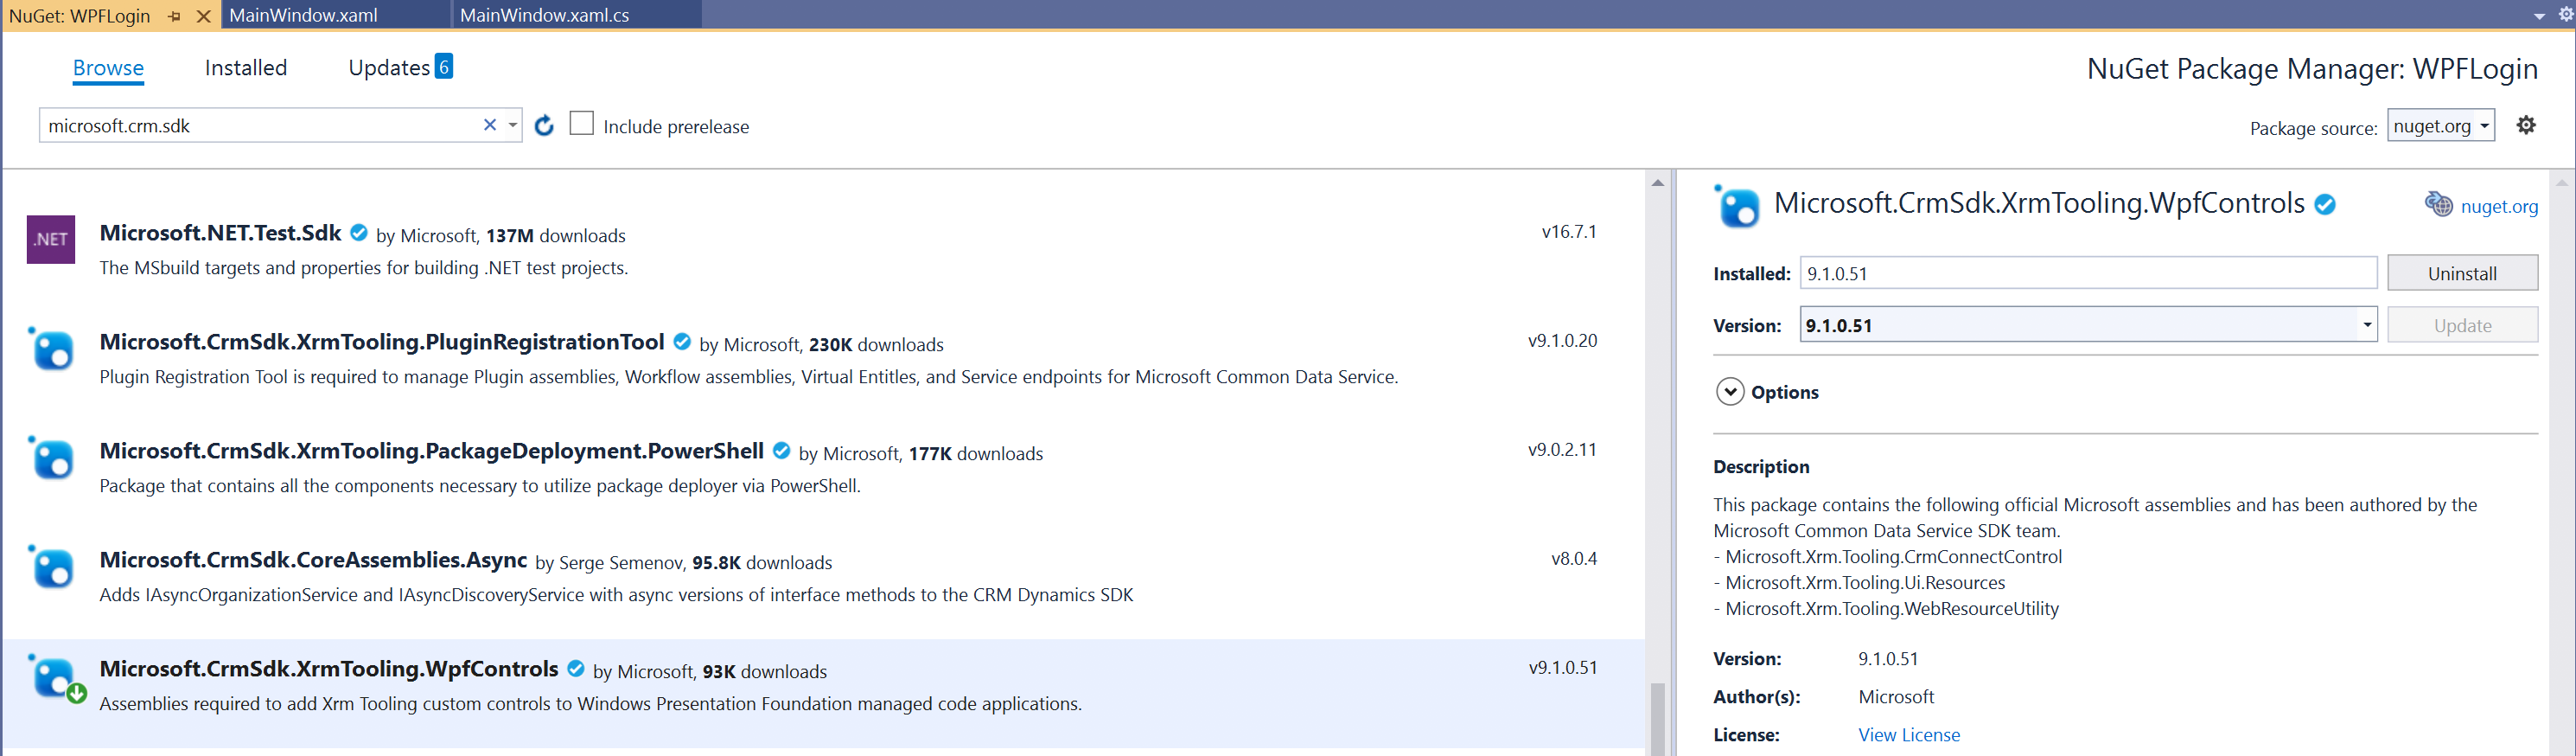
- The first step is to include the references to the assembly in the project. The assembly in question is Microsoft.CrmSdk.Xrm.Tooling.WpfControls

- Next, let us add this assembly in the toolbox so we could add the CRMConnectControl aka the login control to our page
- Right click the toolbox to add new items to the toolbox and select choose items

- This will bring up the following window, choose Browse and select the CRMConnectControl assembly from the debug folder of your application

- Once selected, it will list all controls available in the assembly, we are interested in the CRMServerLogin control so check that one
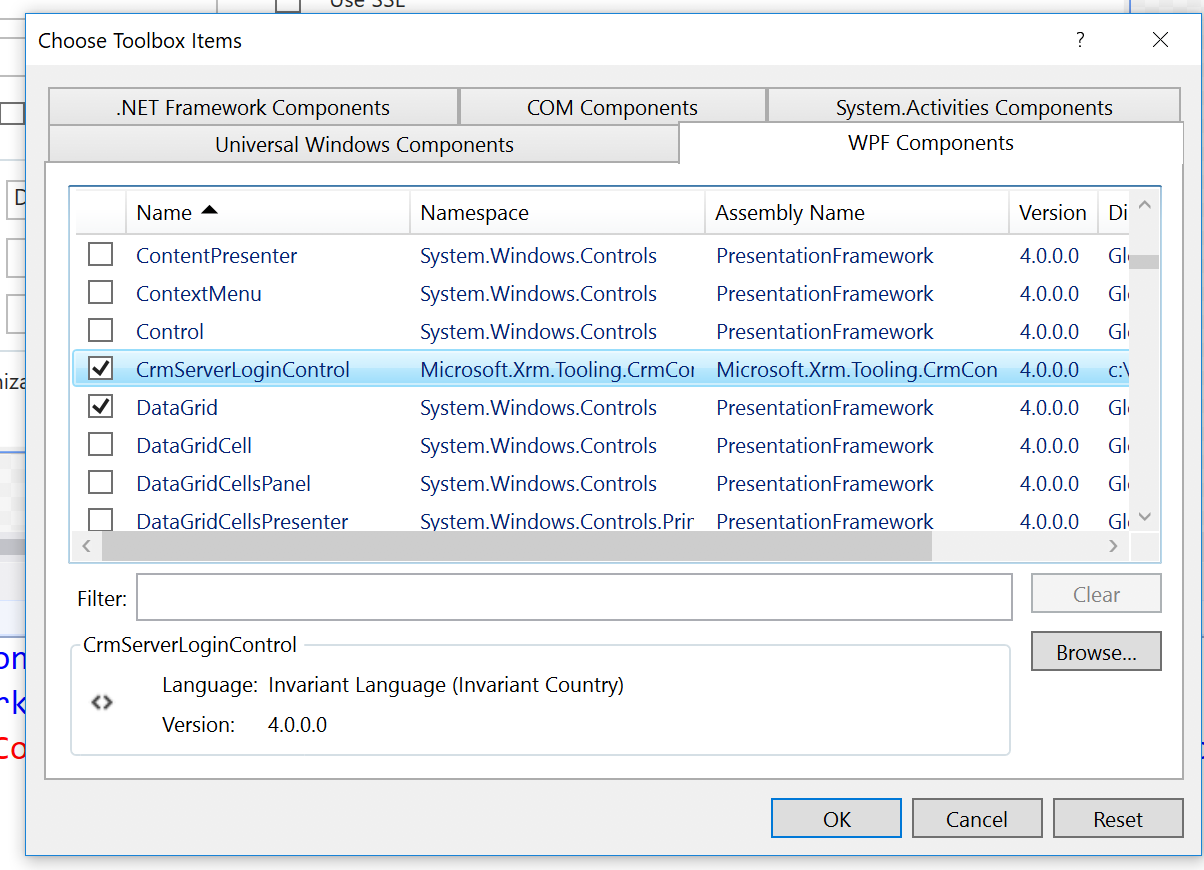
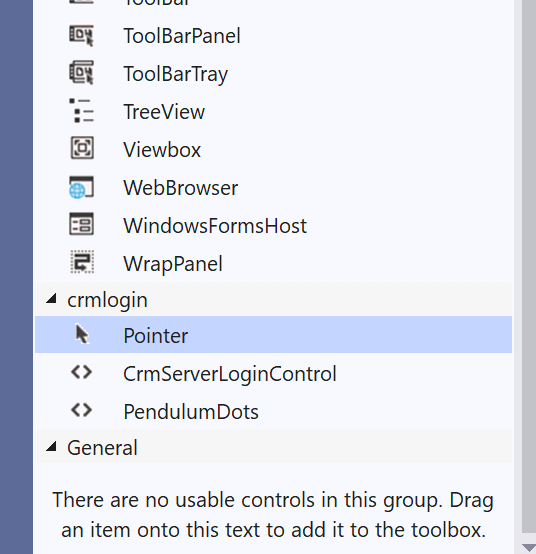
- Click OK to see the control added to the toolbox
- You can now double click on this control to add it to your page
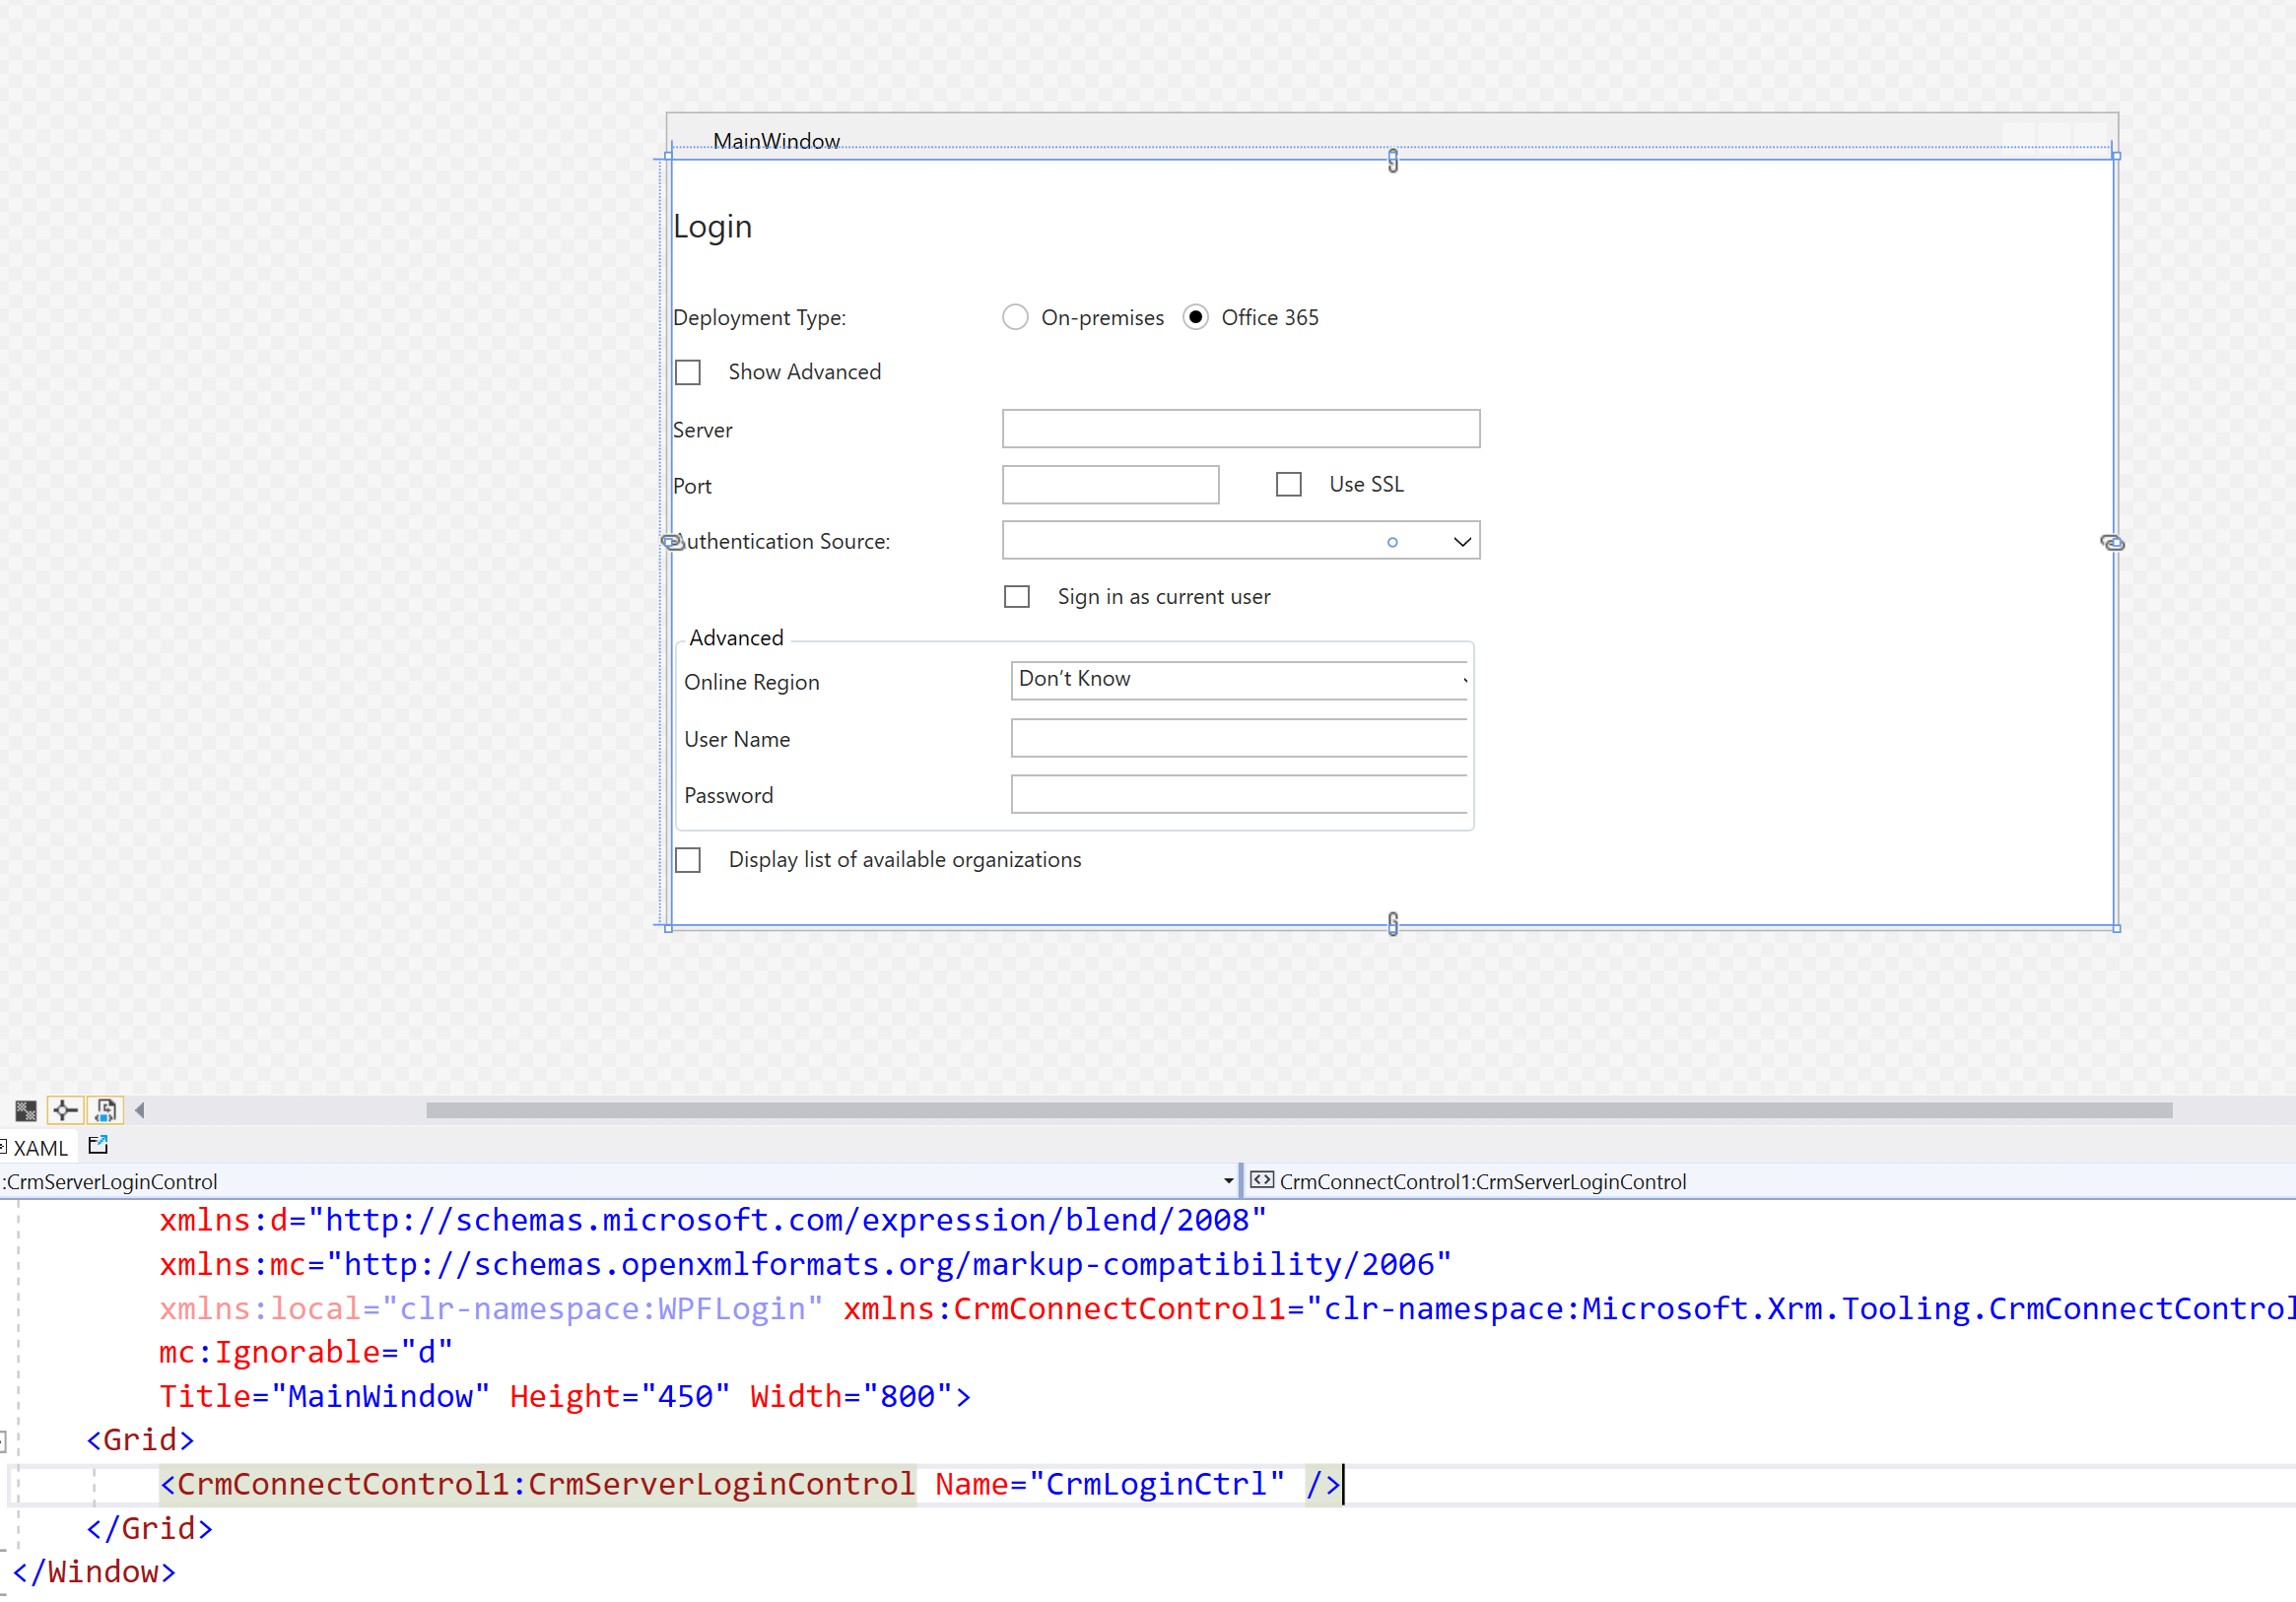
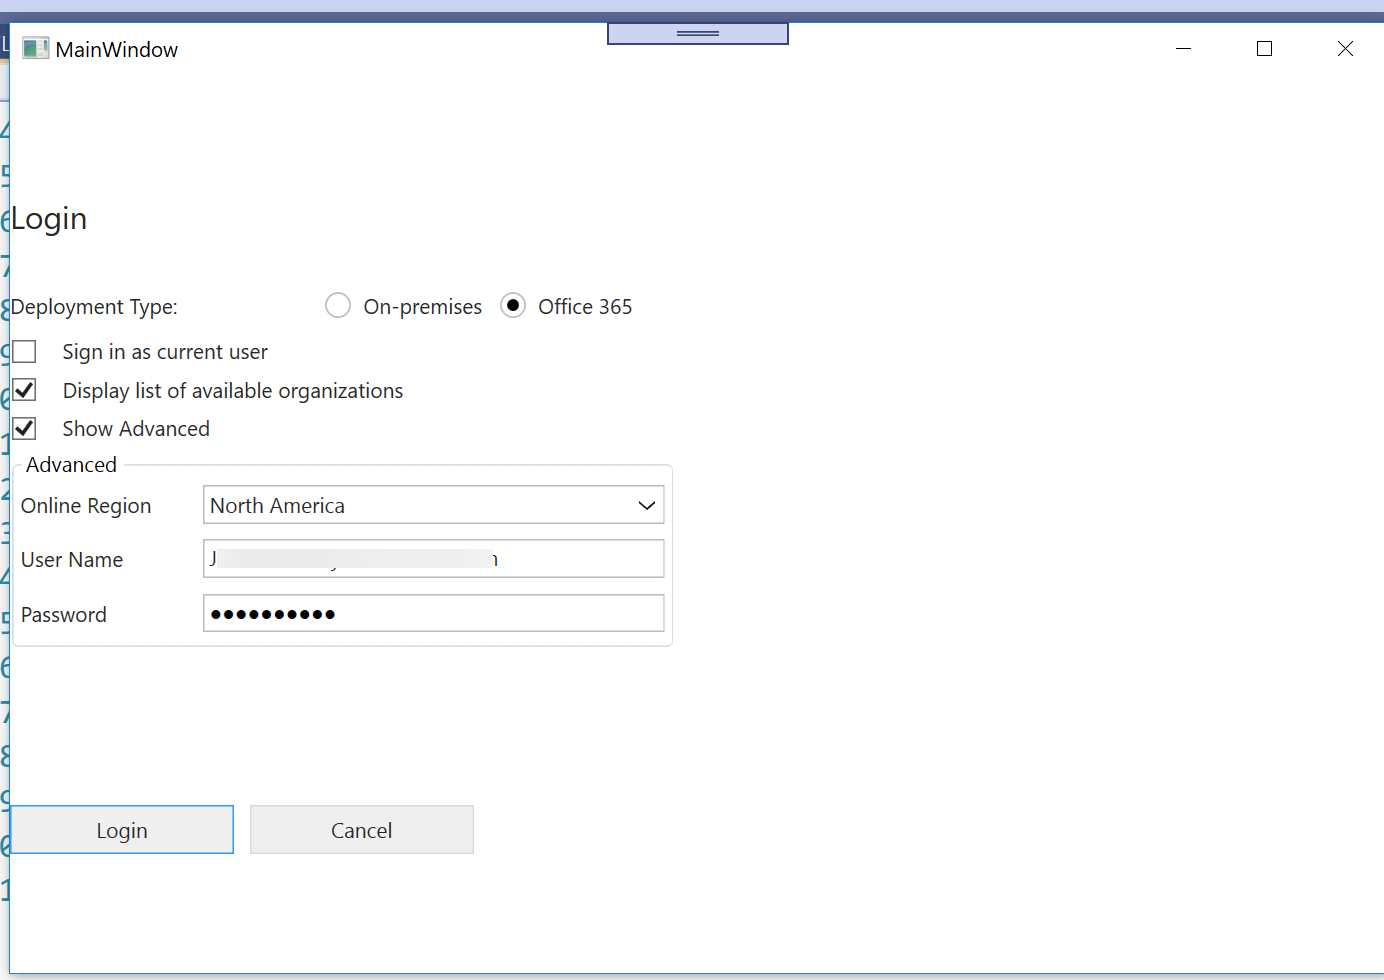
- As soon as it is added you will see the design of the control that includes all components necessary for accepting connection details.
- This control is a fully functional control that does not require you to add any code for establishing connection. You only need to implement the various events that have been made available by the control to perform operations required at each stage.
- This control works in conjunction with the CrmConnectionManager class that is available within the same assembly that we added reference of earlier.
- Write the following code to initialize the Connection Manager class
// make an object of the connection manager
mgr = new CrmConnectionManager();
// Since WS-Trust is no longer supported – provided creds for OAuth authentication
mgr.ClientId = “2ad88395-b77d-4561-9441-d0e40824f9bc”;
mgr.RedirectUri = new Uri(“app://5d3e90d6-aa8e-48a8-8f2c-58b45cc67315”);
//Set Login control as the parent of the connection manager
mgr.ParentControl = CrmLoginCtrl;
- Beginning October 2020, Organization Service Proxy will no longer be supported for establishing a connection as stated here.
OAuth authentication requires Client ID and Redirect URL to be provided. Usually, this information is obtained from the Azure AD Application that you have to create in Azure AD. However per the documentation here, the client ID and redirect URL provided in the code is globally available across all CRM online tenants and could be used in our code.
-
Now when you run the application and enter all the details and hit Login
It will internally try to establish a connection using the details provided without you having to write any code for connection.It will raise the following events in the process:// this wires an event that is raised when the login button is pressed.
CrmLoginCtrl.ConnectionCheckBegining += new
EventHandler(CrmLoginCtrl_ConnectionCheckBegining);// this wires an event that is raised when an error in the connect process occurs.
CrmLoginCtrl.ConnectErrorEvent += new
EventHandler<ConnectErrorEventArgs>(CrmLoginCtrl_ConnectErrorEvent);// this wires an event that is raised when a status event is returned.
CrmLoginCtrl.ConnectionStatusEvent += new
EventHandler<ConnectStatusEventArgs>(CrmLoginCtrl_ConnectionStatusEvent);// this wires an event that is raised when the user clicks the cancel button.
CrmLoginCtrl.UserCancelClicked += new
EventHandler(CrmLoginCtrl_UserCancelClicked);- In the ConnectionStatusEvent, check if connection is established and the connection manager will return reference to the CRMServiceClient that could be used going forward in your code to perform operations in CRM application.
CrmServiceClient CrmSvc = mgr.CrmSvc;
Leverage this Login Control to benefit from the connection logic already implemented in this control and also to make sure you stay up to date with all the changes added to the login logic over a period of time. Being part of the CRM SDK this will most likely be updated with every update to the login methods and then all you need to do is to add a reference to the latest library and you are good to go.
- In the ConnectionStatusEvent, check if connection is established and the connection manager will return reference to the CRMServiceClient that could be used going forward in your code to perform operations in CRM application.