User Review
( votes)Introduction
Recently we had a business requirement where we needed to add Dynamics365 Report as a Note of the current entity record in Resco Mobile App. So to achieve this, we followed the below steps:
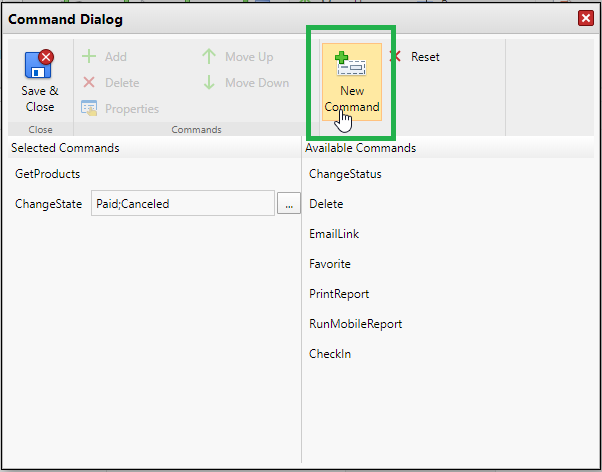
1. We added a custom button (i.e.Command) on the Entity Form of the Invoice
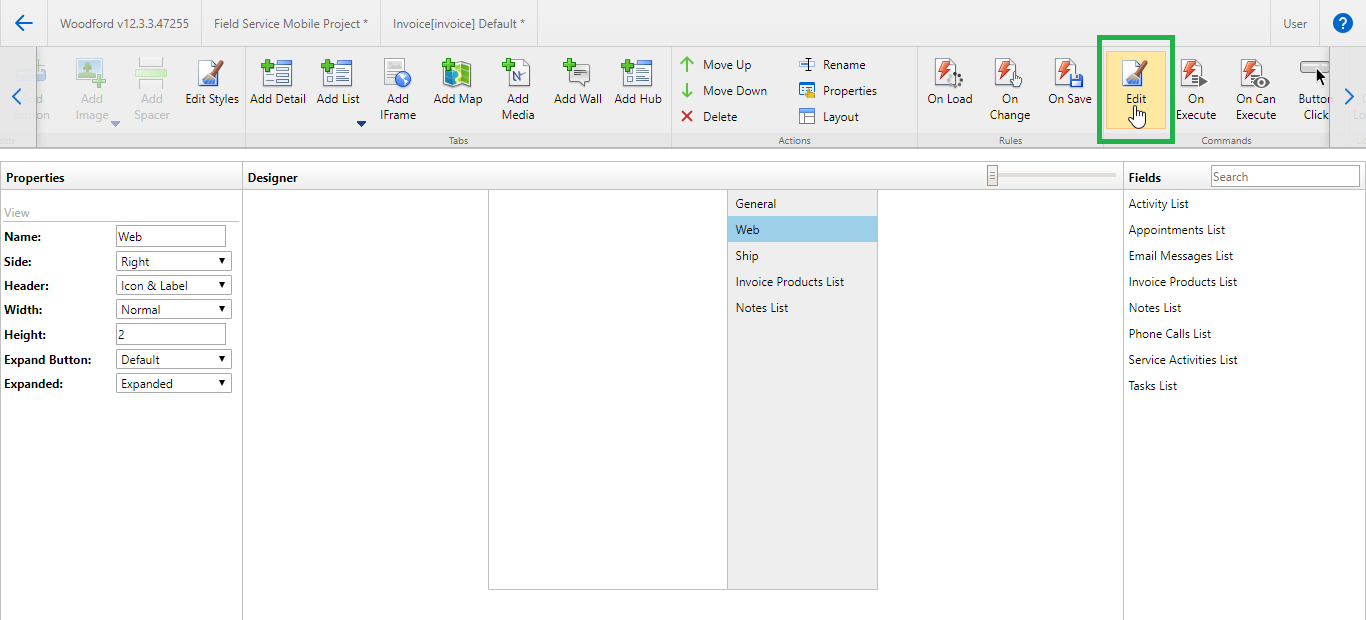

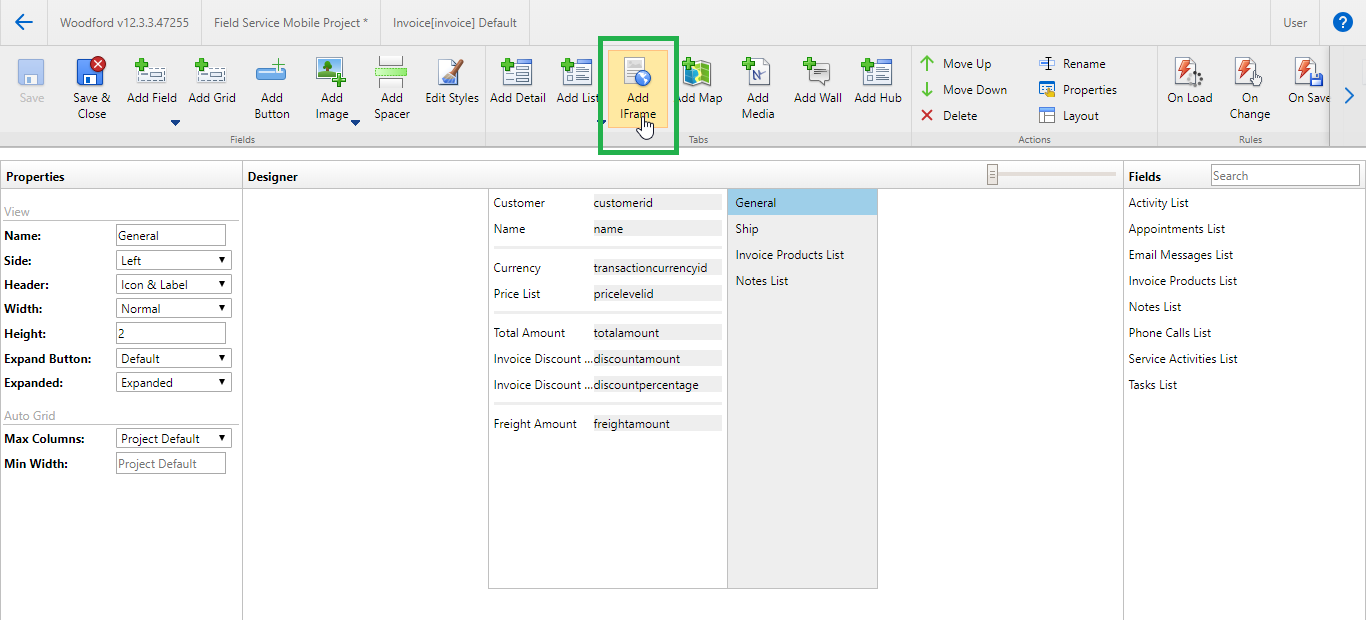
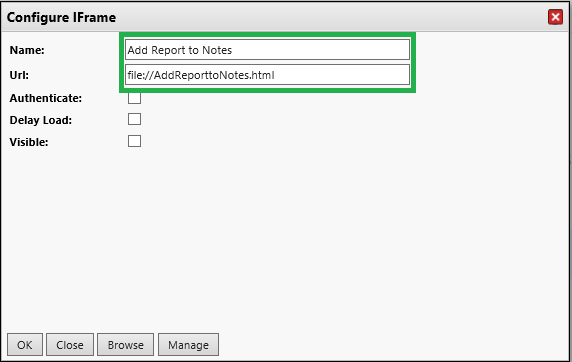
2. Then we added an “HTML” file (with “JavaScript” code) in the “Iframe” of Entity Form of Invoice entity in order to bind “Click Event” with the “Send Invoice” button.
3. Then we added the function “downloadReport” (i.e. for downloading dynamics365 report) in our script as show below,
//Funtion for downloading reports
downloadReport = function (fileName, format, reportId, regarding, success, failed, scope) {
/// <summary>Downloads the MS Dynamics report into a file.</summary>
/// <param name=”fileName” type=”String”>A file name for resulting file. Leave "null" to let app to safely generate the file name and extension.</param>
/// <param name=”format” type=”String”>One of following formats (must be supported in Dynamics): XML, CSV, PDF, MHTML, EXCELOPENXML, WORDOPENXML, IMAGE.</param>
/// <param name=”success” type=”function(location)”>A callback function that is called with the full path to downloaded file.</param>
/// <param name=”failed” type=”function(errorMsg)”>A callback which is called in case of error.</param>
/// <param name=”scope” type=”Object”>The scope for callbacks.</param>
try {
var params = JSON.stringify({
format: format || “PDF”,
outputFileName: fileName,
outputFolder: this.outputFolder,
outputFilePath: this.outputFilePath, // for internal use only
reportId: reportId,
regardingEntity: regarding ? regarding.entityName : null,
regardingId: regarding ? regarding.id : null
});
//command for downloading report
MobileCRM.bridge.command(“downloadReport”, params, success, failed, scope);
} catch (e) {
MobileCRM.bridge.alert(“An Error Has occurred ” + e);
}
};
4. And then used this function in the “UI.EntityForm.onCommand” event, as shown below,
MobileCRM.UI.EntityForm.onCommand(“custom_AddReportinNotes”,
function (EntityForm) {
_entInvoice = EntityForm;
var reportId = “32C85C59-7D04-E711-80E6-00155DB8652A”; //GUID of Dyamics365 Report
try {
if (isValid(EntityForm) && isValid(EntityForm.entity)) {
//Reference Object of Entity Record
_refInvoice = new MobileCRM.Reference(EntityForm.entity.entityName, EntityForm.entity.id, EntityForm.entity.primaryName);
//Downloaing report
downloadReport(“”, “pdf”, reportId, _refInvoice,
function (result) {
MobileCRM.bridge.alert(“Report Downloaded Successfully!”);
_resultingReport = result;
if (isValid(_resultingReport)) {
//Path of downladed report file
var filePath = _resultingReport;
//Create a Parent Relationship object (i.e. on which you want to add Note)
var objRelationship = new MobileCRM.Relationship(“objectid”, _refInvoice);
//Add Downloaded Report as Note on the Current Entity Record
MobileCRM.DynamicEntity.saveDocumentBody(null, null, objRelationship, filePath, null, function (result) {
if (isValid(result)) {
MobileCRM.bridge.alert(result.entityName + ” ‘” + result.primaryName + “‘ successfully saved.”);
}
}, MobileCRM.bridge.alert, null);
}
},
function (error) {
_resultingReport = null;
MobileCRM.bridge.alert(error.message);
});
}
} catch (e) {
MobileCRM.bridge.alert(“An Error Has occurred ” + e);
}
});
5. We then published the Resco Mobile Project and synced the Resco Mobile App with the same and then navigated to the Invoice record and clicked on the “Add Report in Notes” button (i.e. Custom Command).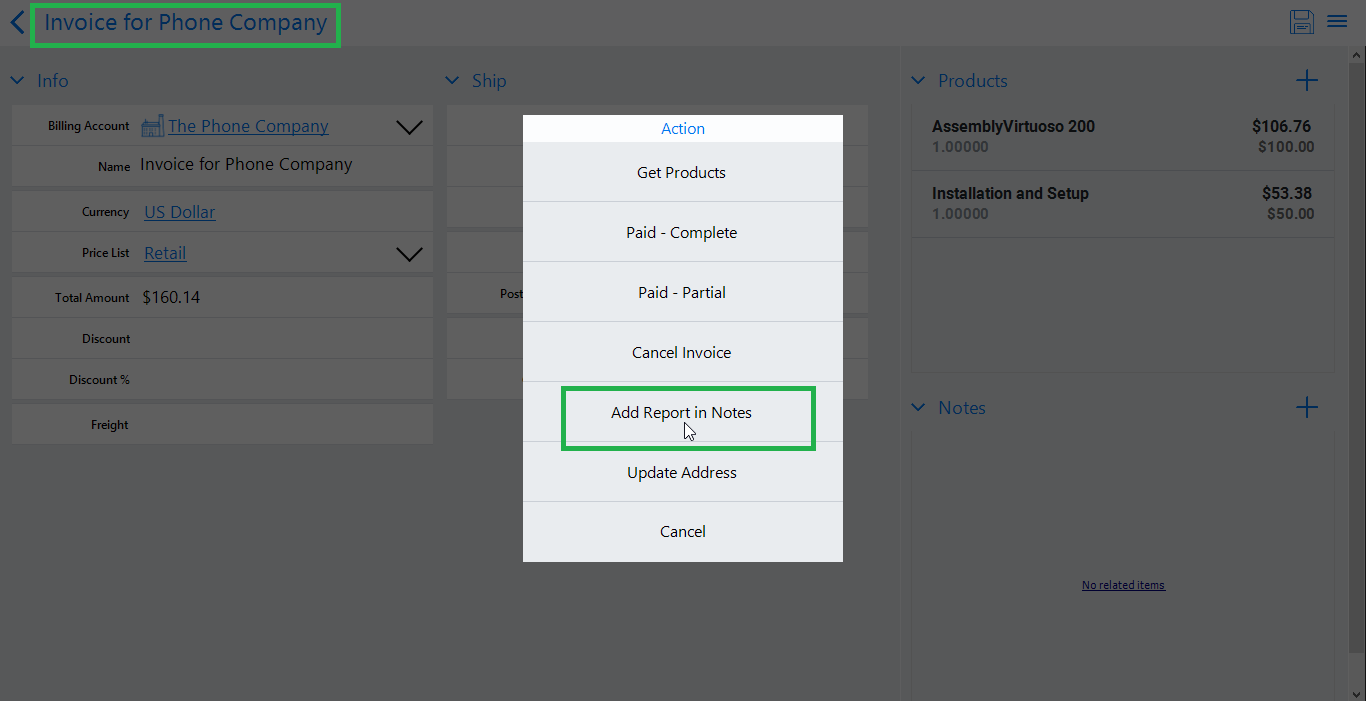
6. Once the button is clicked, it took a few seconds to download the “Invoice Report” and then added it to the Notes of the current Invoice record.
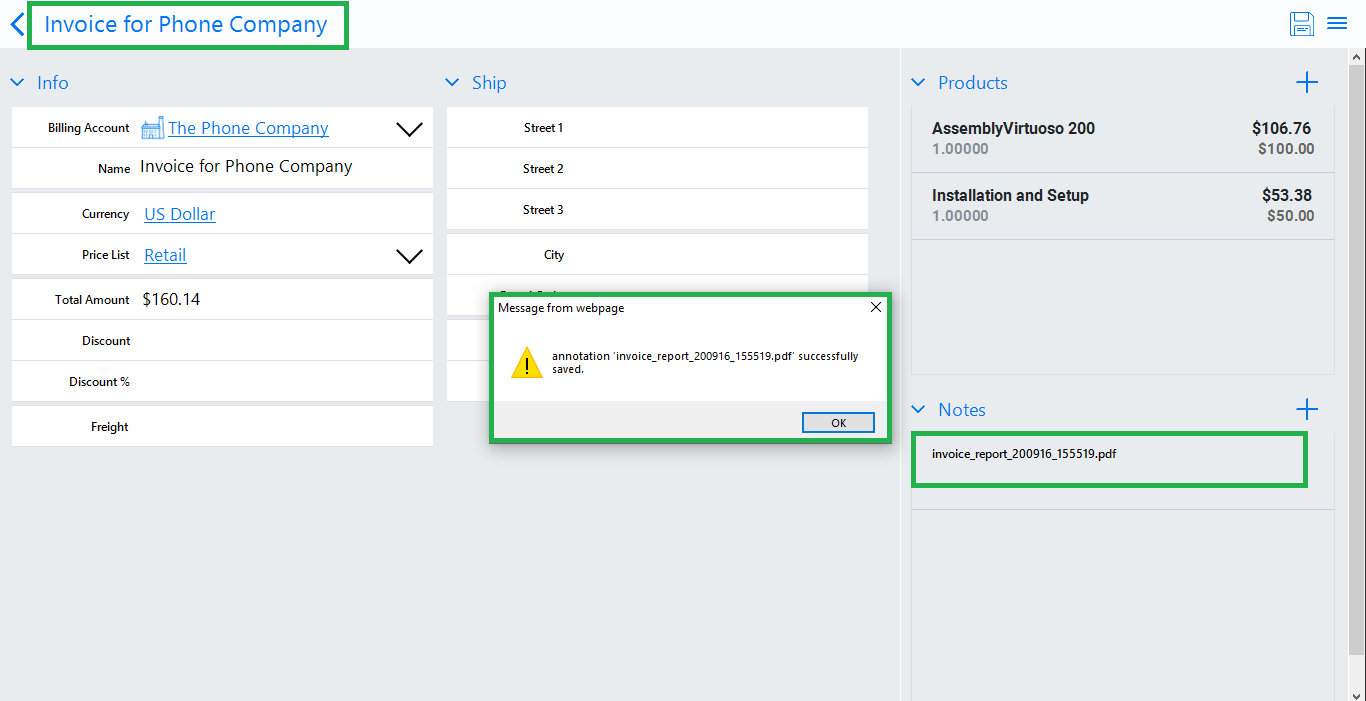
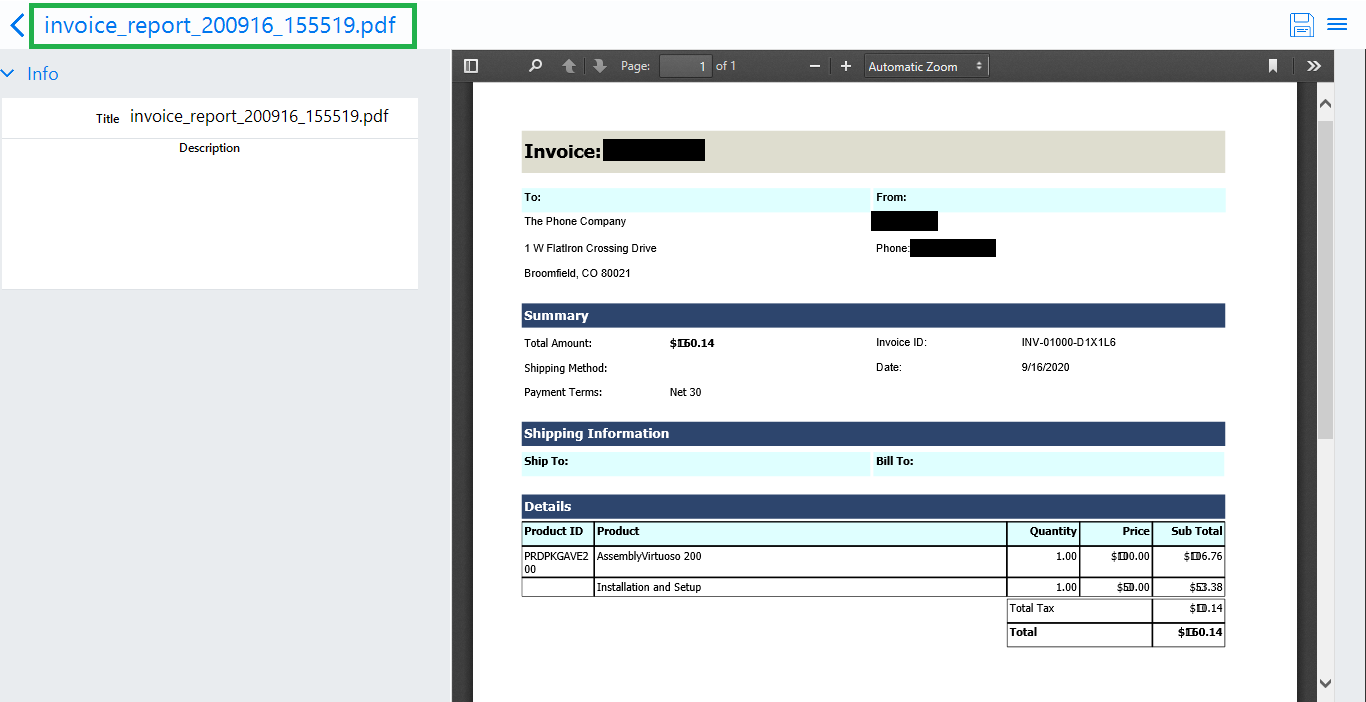
7. Finally, after synchronization of the Note record of the “Invoice Report”, it is added on that Invoice record in Dynamics365.

Notes:
1. We made sure that the Dynamics365 Reports are enabled for Resco Mobile App in the organization.
2. We also made sure the “Notes” (i.e.Annotation) entity was enabled in Resco Mobile Project and is available on the Entity (i.e. entity for which we are going to use this functionality)
Conclusion
Technicians can use the “Add Report as Note” functionality in order to attach Dynamics365 Reports (such as Invoice report) in Notes of the Entity record in Resco Mobile App.