User Review
( votes)Introduction
In the 2020 wave 2 release, Microsoft has released some interesting new features which are now available for early access, among them one feature is customizing the timeline for the below new features.
- Expand the timeline records by default.
- Hide “What you’ve missed.”
- Hide status tags.
- Show email as Conversation or as individual messages.
Let’s see how can we configure and use these new features:-
- Sign in to Power Apps and select your environment.
- Open the Default solution or create a new solution and add the required entity in the solution.
- Now select the entity, and then open the Forms, For example, select the Account entity, and then select the Forms tab.
- You will see a list of forms that are available for the entity. Select the form where you want to configure the new timeline features.
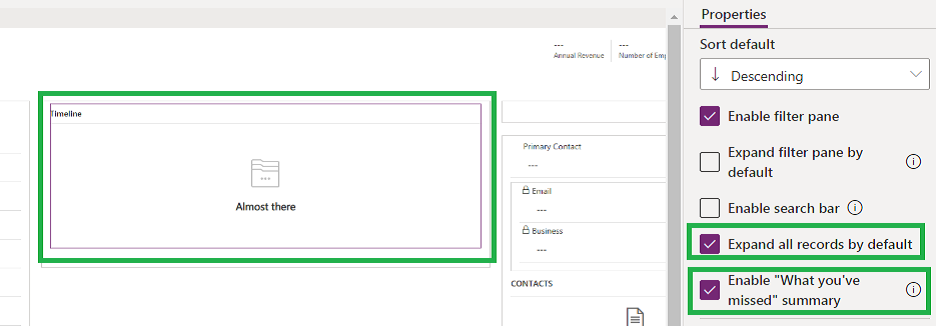
- Now select the timeline control inside the section. The properties appear in the right pane.
To enable “Expand the timeline records by default” and Hide “What you’ve missed” select the respective checkboxes as shown below.
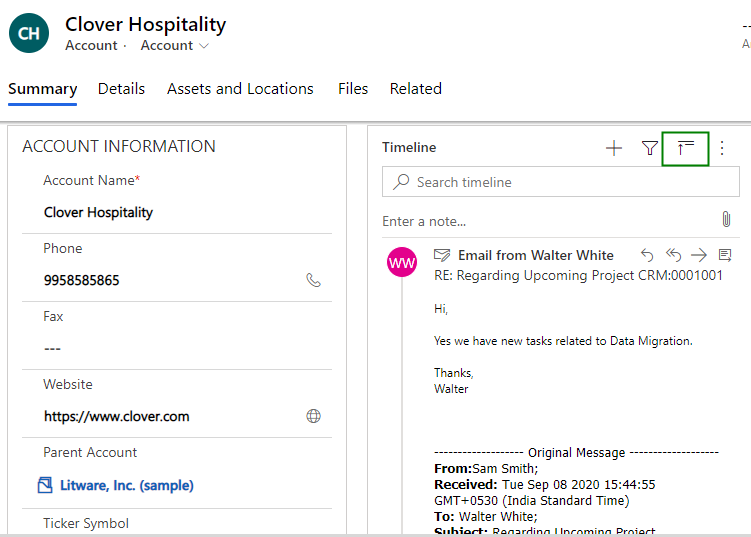
Expand the timeline records by default
Previously, if we had notes with multiple lines, only a few lines of text would have been visible to us by default, so to see the rest of the note we had to click on the note to expand and see the rest of the content, but now we can show full content by default.
Once you enable this feature, all activities will expand to show the full contents as shown in the below screenshot.
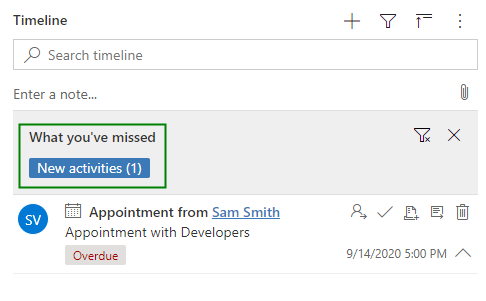
Hide “What you’ve missed”
Dynamics 365 will record the time you last accessed the record. “What you have missed” filter allows you to see the activities that you missed since that scheduled date and time. Sometimes it may happen that user misses appointments and wants to see what they have missed. The setting is disabled by default. When enabled, a notification is displayed as shown in the below screenshot.

Hide status tags
Status tags displayed in the timeline help users to see at a glance whether an activity—for example, an email—is in the active, overdue, or closed state. Status tags are enabled by default.
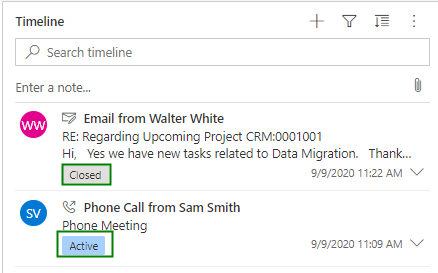
We can hide the Status tag for the Activities. For Example, to hide the status tag for Email activity, Select Email in the timeline properties and deselect the “Enable status tag” checkbox. Save and Publish the changes.

Now as we can see in the below screenshot, Status tag is hidden for Email.
Note: The above configuration provision is only available in new form designer i.e. from https://make.powerapps.com
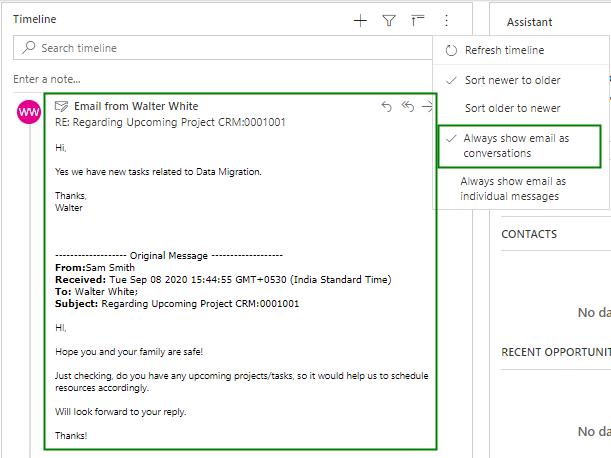
Show email as Conversation or as individual messages
This configuration is not available in form designer but we can configure it on the form when viewing records.
You can change the appearance of the message list and reading pane in the Timeline. Emails in the message list can be displayed as individual Emails or as a conversation.
- Show Email as Conversation: When you select the option “Show Email as Conversation” Email will be displayed in Conversations. A conversation includes all Emails in the same thread. Within each Conversation, Emails are sorted with the newest message on top. When you receive a new email that’s part of a Conversation, the whole Conversation moves to the top of your list.
- Always Show Email as Individual Messages: When you select this option, Emails are displayed in the Timeline pane individually, as shown in the below screenshot.

Conclusion
We can now configure the new Timeline features in Dynamics 365 CE