User Review
( votes)Before We Start
Due to the current COVID-19 pandemic, Microsoft has decided to move the Wave 1 2020 Dynamics 365 and Power Platform update roll-out from April to May. You can read the official blog post here: Our commitment to customers to help ensure business continuity
Dynamics 365 – Wave 1 2020 Highlights
This post will cover some highlights of the Wave 1 2020 update coming to Dynamics 365 and the Power Platform. Here are the highlights we will cover:
- Enhanced experience for adding products to Opportunities
- PDF Generation experience
- Views updates
- Knowledge Article update
*If you want to check out the updates, then set up a trial of Dynamics 365, or update a Sandbox environment in your existing tenant then apply the Early Release.
Enhanced Add Products Experience
In the past, the experience of adding products to a record was a pain. It was not simple and you couldn’t add multiple products in an easy way. The new enhanced add products experience has greatly improved this process.
Updating the Settings
Before showing the experience, this new experience needs to be enabled. Here is what you need to do:
- Open the “Sales Hub” app
- Navigate to the “App Settings”
- Select the “Product Catalog Settings”
- Toggle the option to “Yes” next to “Adding products enhanced add product experience”
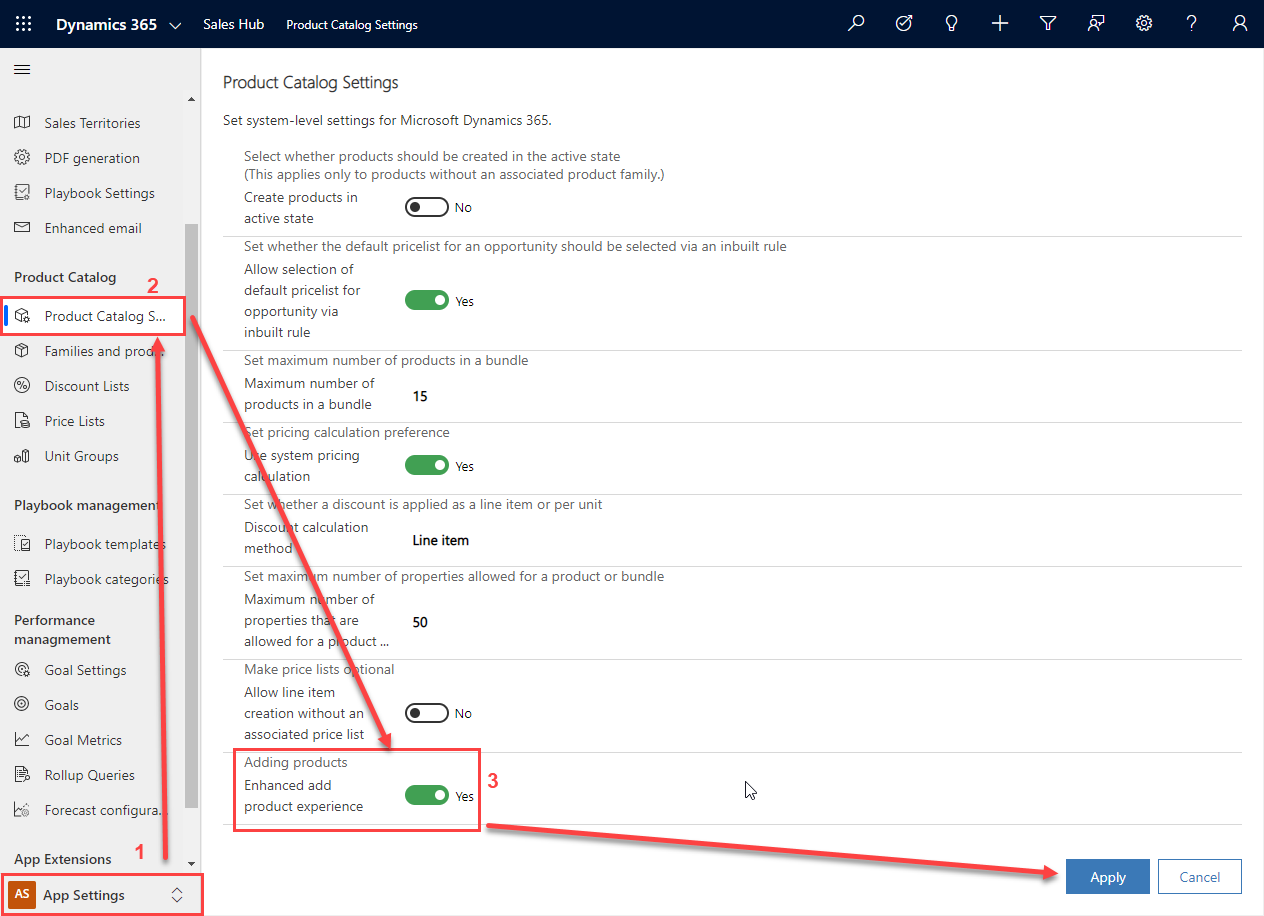
Please note: This experience in only available for Opportunities at this time. However, the hope is that this experience will eventually be added to Quotes, Orders, and Invoices.
Add Products Experience
Once the settings are updated, navigate to the Opportunities and create a new opportunity, or open an existing opportunity. Next, select the “Products” tab and click the “+Add Products” button.
Please note: You may see 2 add product buttons above the subgrid. The button that uses the new experience is the “+Add Products” button and NOT that “+Add Product” button. This difference is the letter “s” at the end.
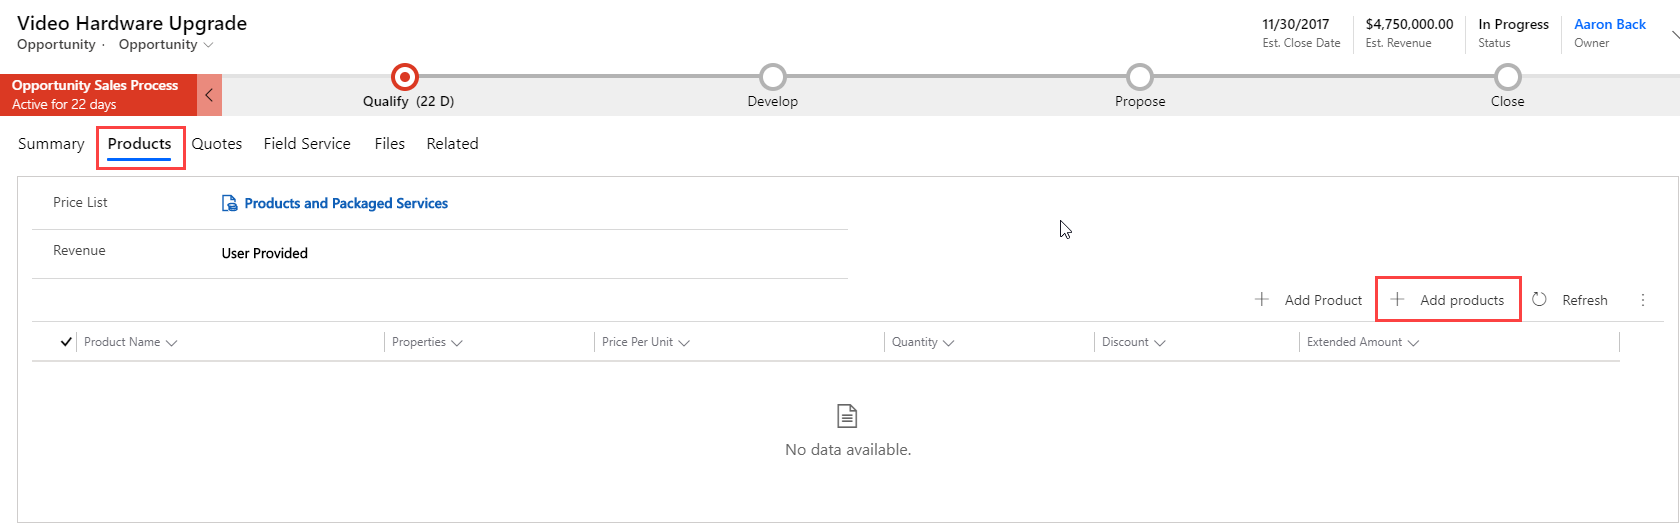
The Add Products panel
The “+Add Products” button will open a new side panel and will display “Add Opportunity Products” at the top. This panel has a lot of options to interact with, but I will try to cover most of them.

Searching for Products
The first thing to notice is the search field. The nice thing about this is that the results returned will search for the text within the product name no matter where it’s located. For example, the search term “arm” will be made bold and the results list filtered.
The next area to note is that the quantity can be updated and more product information shown. To update the quantity, simply click on the “+” icon to the right of the product, and to see the additional product information, click on the name of the product.
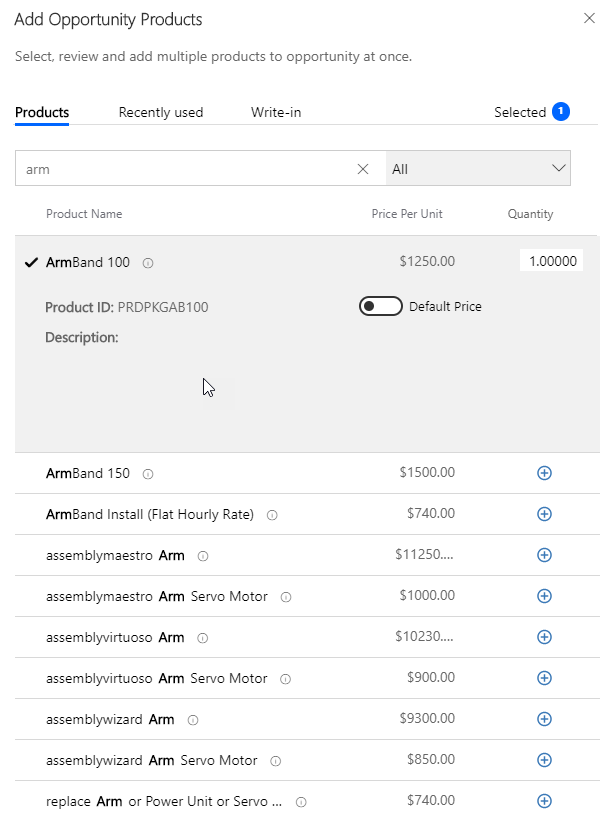
After you have updated the quantities on the products, you will see the number of products indicated in the top right.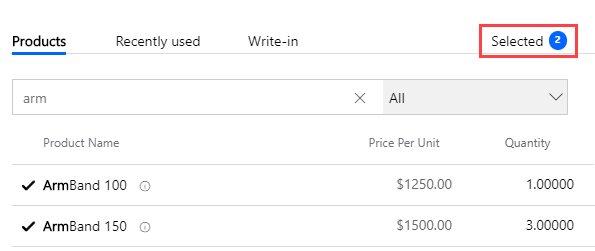
Recently Used tab
The “Recently Used” tab will display products you have recently selected for opportunities. This can be handy if there are products you frequently sell and don’t want to search for them each time.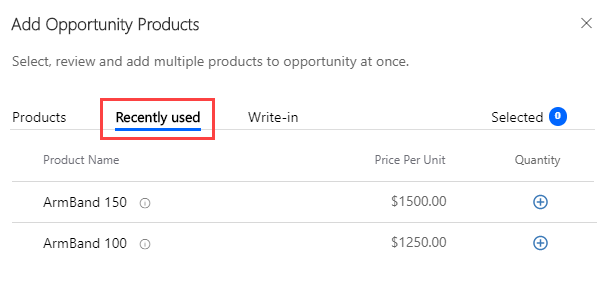
Write-in Products
The new add products panel provides the option to add Write-in Products. This allows you to add a mix of products from the catalog and write-in products to the opportunity.
Adding Products to Opportunity
Once you are satisfied with the products to add, click the “Add to Opportunity” button at the bottom of the panel. This will add all the products selected with the quantities that were input.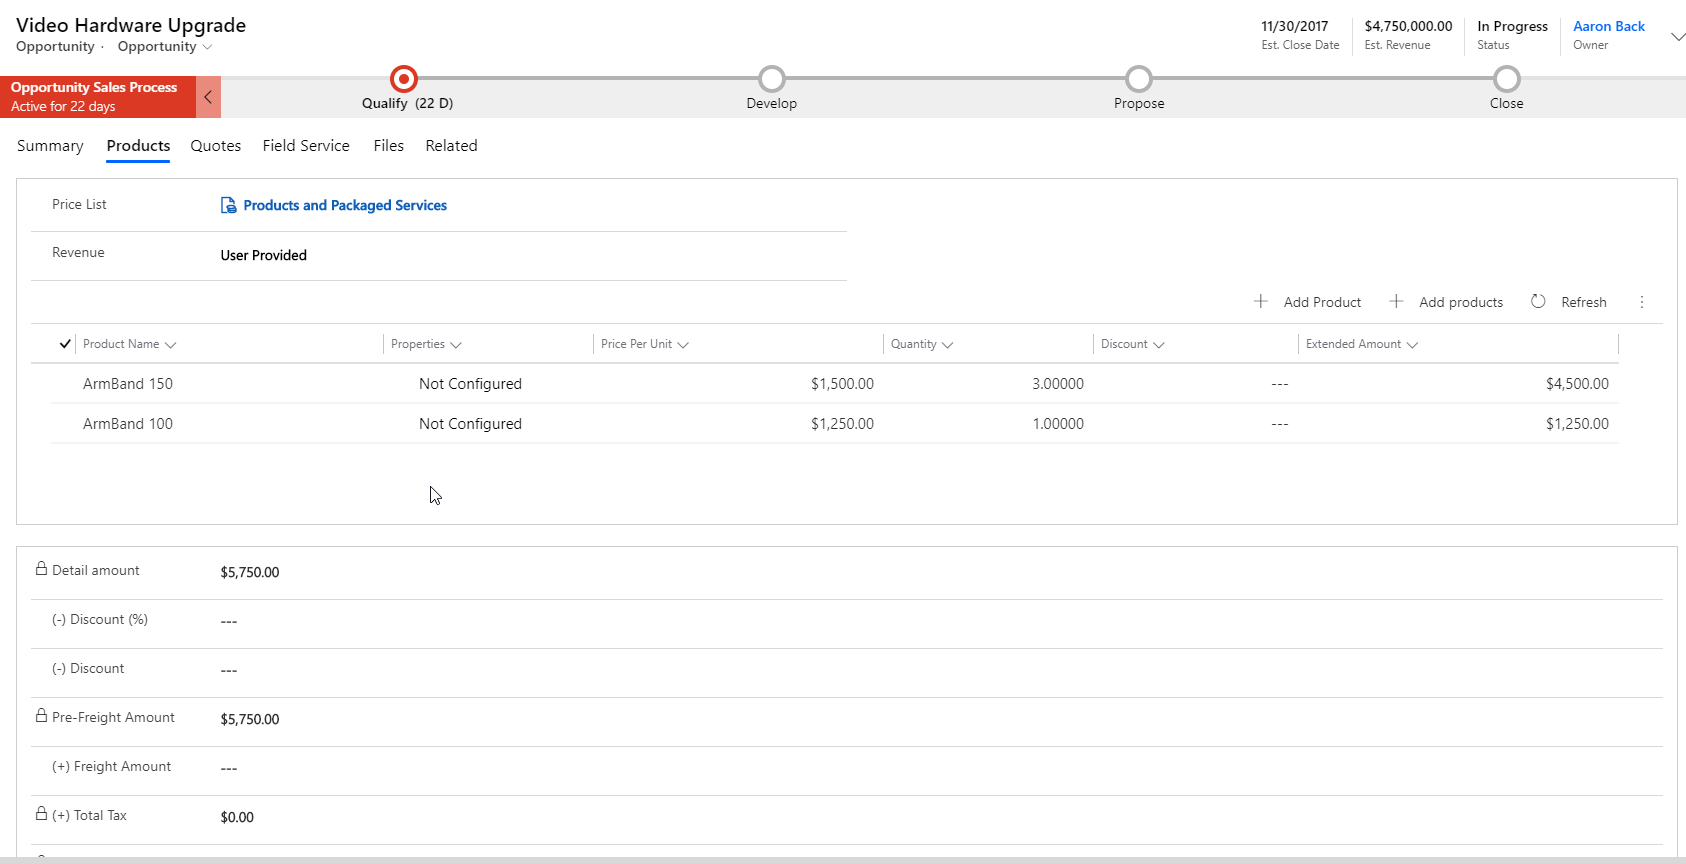
As you can see above, the products are added and the totals calculated below the subgrid.
This experiences makes adding products much easier and simpler.
PDF Generation
The PDF Generation option for Dynamics 365 has been updated to include additional entities. Previously, the only option available was “Quotes” which I referenced in my prior blog post. The PDF Generation allows you to create a PDF from a Word template for the selected record. So, if you don’t have any Word templates set up, then the menu buttons will not display any options.
PDF Generation Settings
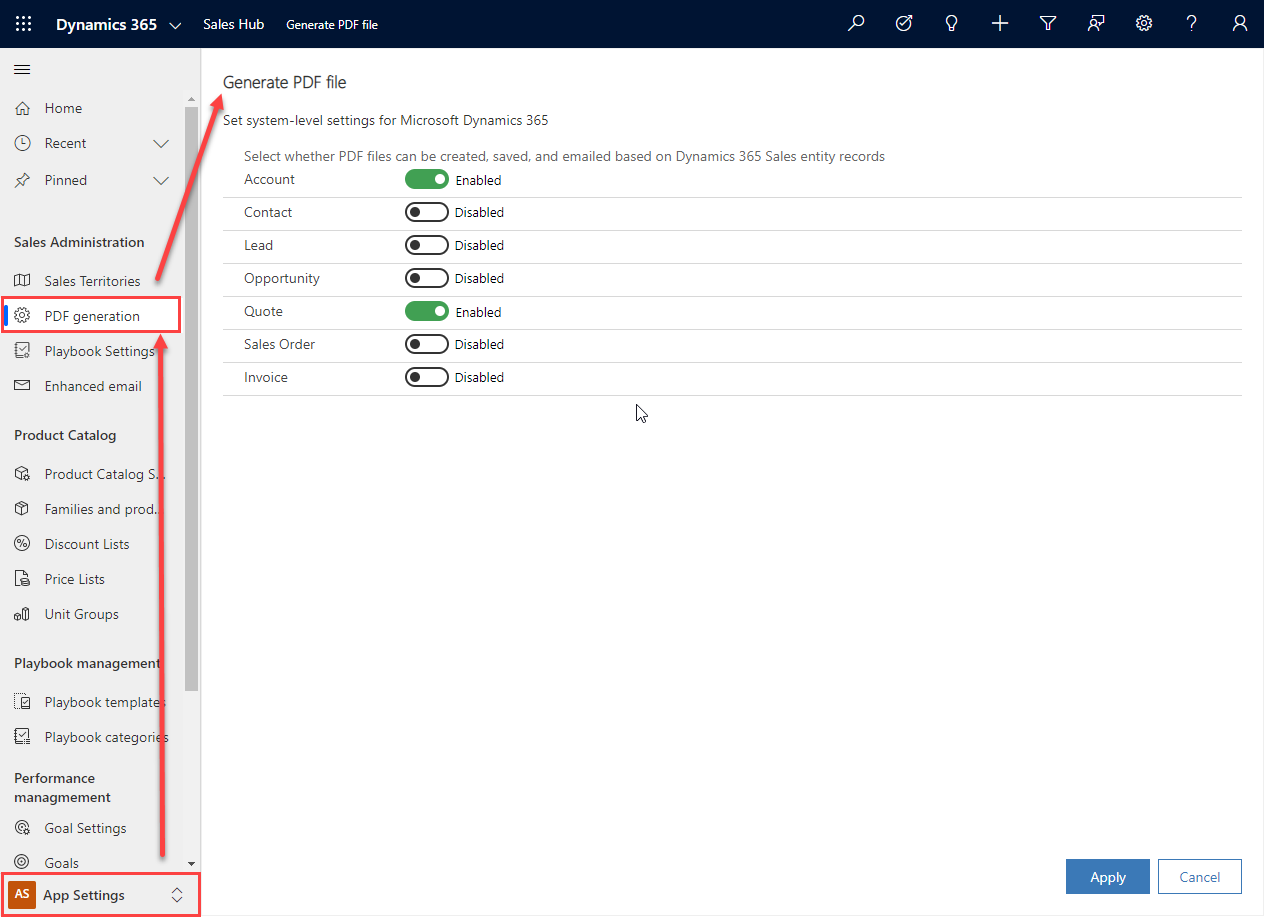
Before you can start using the PDF Generation functionality, you need to enable the settings. To do this, open the “Sales Hub”, navigate to “App Settings”, and choose “PDF Generation”. On this page select which entities you would like to enable.
Generate the PDF
Once the settings are updated, there will be 2 new buttons added to the enabled entities. The buttons are “Create PDF” and “Email as PDF”.
![]()
When either button is clicked, a menu will appear below the button to display the Word template options.
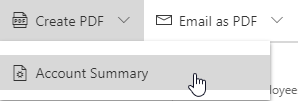
Select the option from the menu to start the PDF Generation process.
Saving to SharePoint
Another enhancement that has been added to the PDF Generation experience is the option to save the PDF file to SharePoint. If you have SharePoint integration set up, then you will be prompted with an option to save to SharePoint.
If you choose “Save”, the PDF document will be saved to a SharePoint folder and will display the document in the “Documents” subgrid for the record. Below is the process that will happen.
First, you will see a prompt of “Saving to Sharepoint”.
Second, you will see a small notification that the document save “Saved to SharePoint”.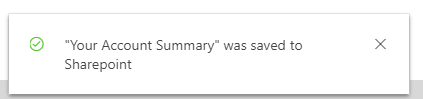
Lastly, you will see the file listed in the “Documents” subgrid.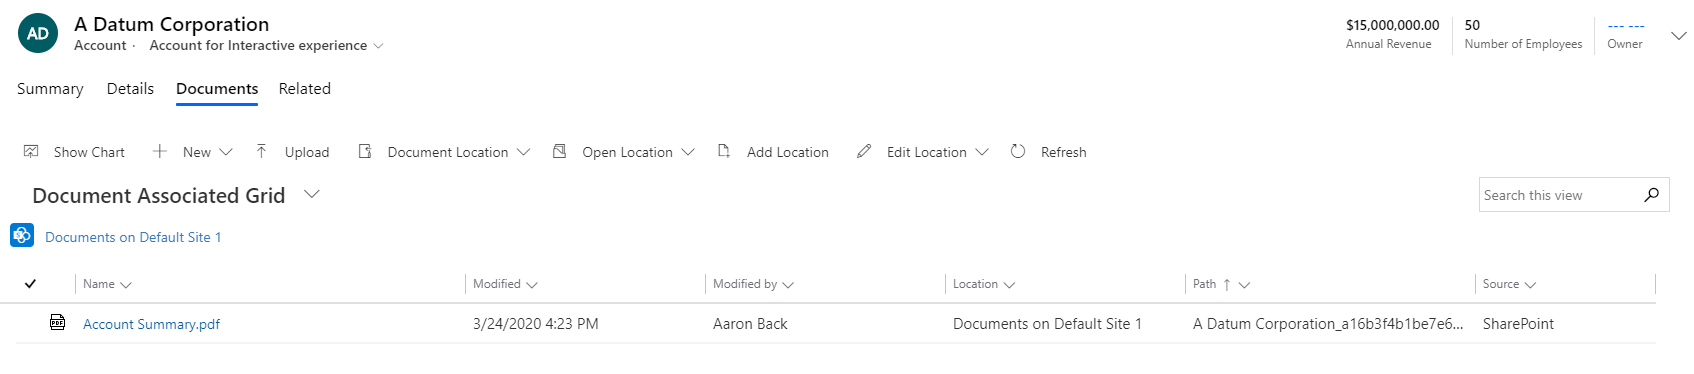
Dynamics 365 Views updates
There have been a few small enhancements made to the Views within Dynamics 365 (and Power Apps model-driven apps).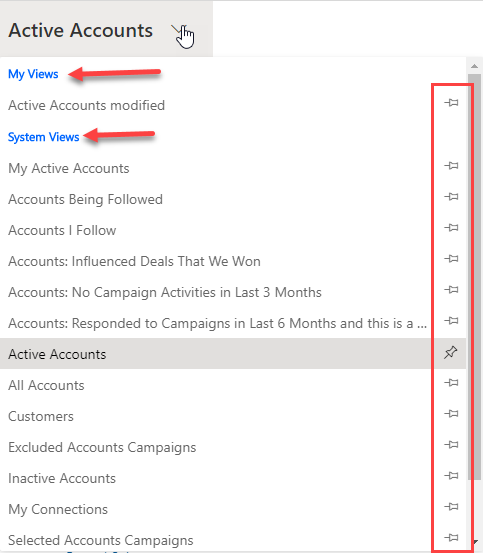
Views Drop-Down Menu
First, the drop-down list of the Views has been updated. Above you will see that the “My Views” (Personal Views) and “System Views” are clearly separated with blue headers. Also, the “My Views” are now located above the “System Views”.
The next thing you will notice is that the pins are located on the right-hand side of the menu. Previously, there on the left-hand side.
Lastly, if you have a long name for a View, then more characters of the name are displayed.
Filtering Updates
Another area that was updated was the filtering of the records in the View. For example, if you want to filter the list by a date field, there are now more options to choose from.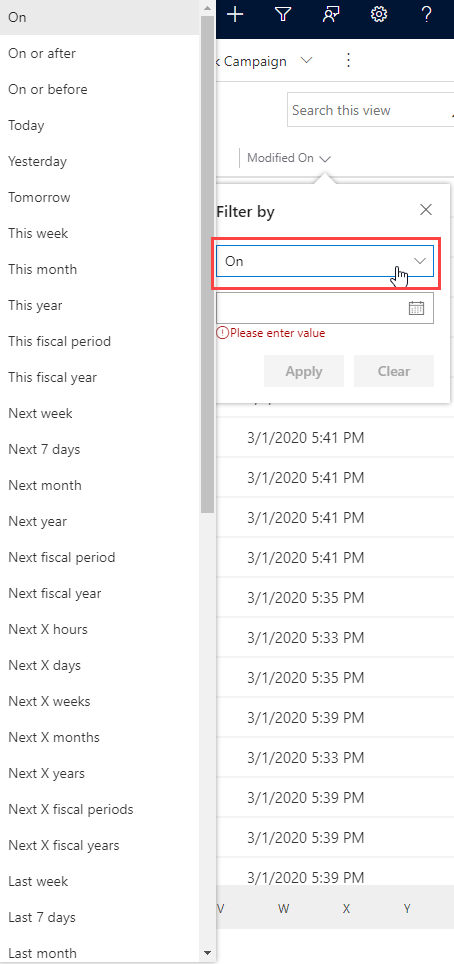
Above you will see the date filter options closely match the options found in the “Advanced Find” filtering.
Knowledge Article update
Knowledge Articles are an area that some people like and some don’t. However, a recent update may help with more folks using them. Previously, if you wanted to add an image to a Knowledge Article, the image could only be added by URL. Now, you can upload images from your computer.
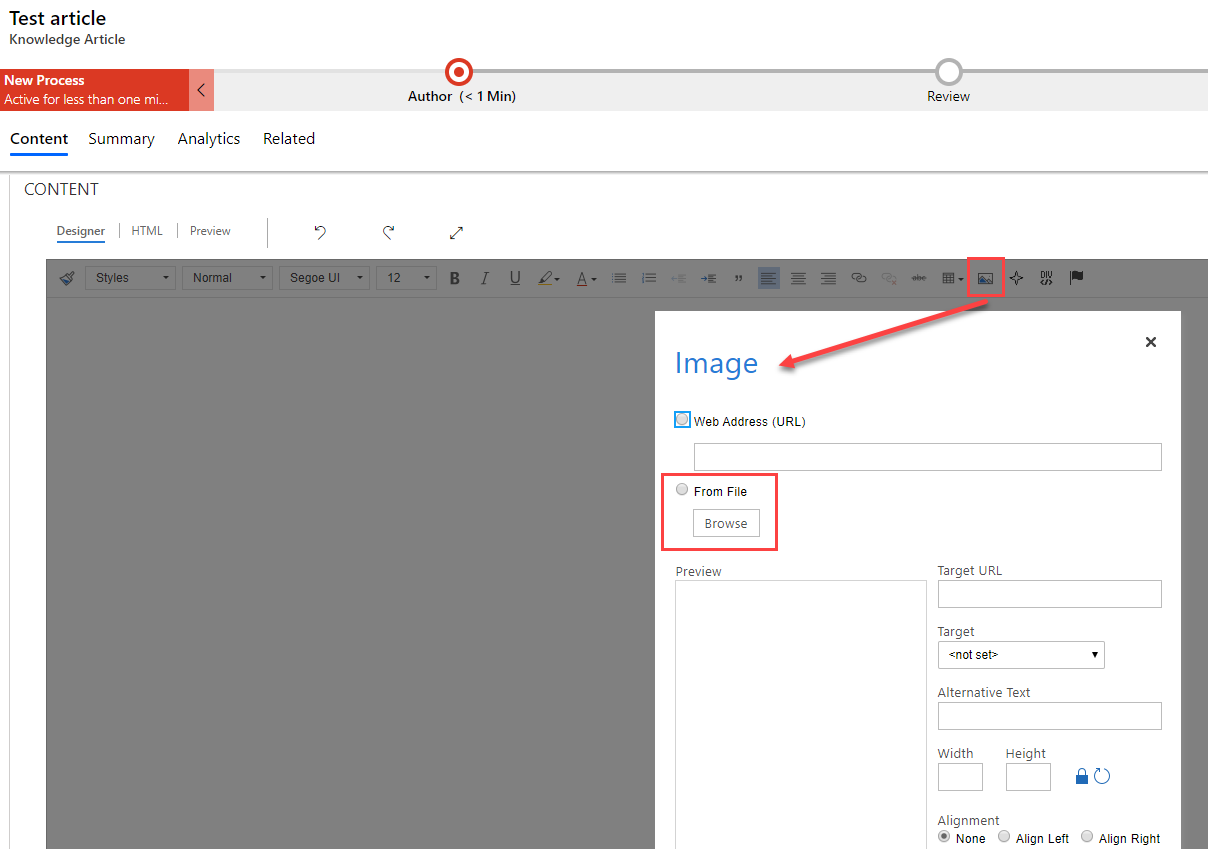
Once you have chosen the image, you will see a preview screen where you can update the size, alignment, target, and alternative text.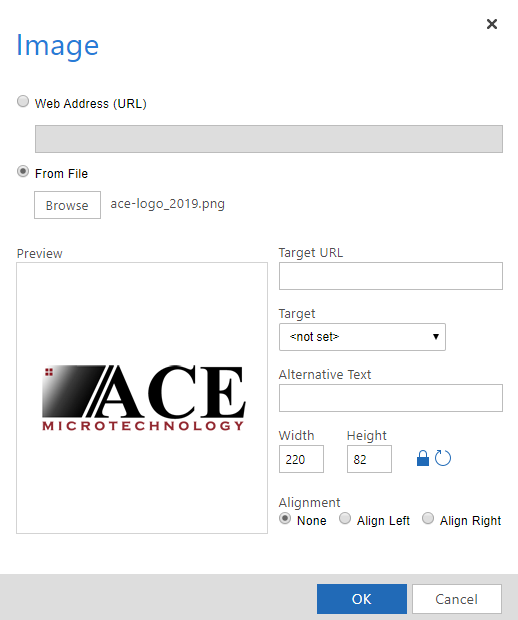
Below is an example of an image added to a knowledge article.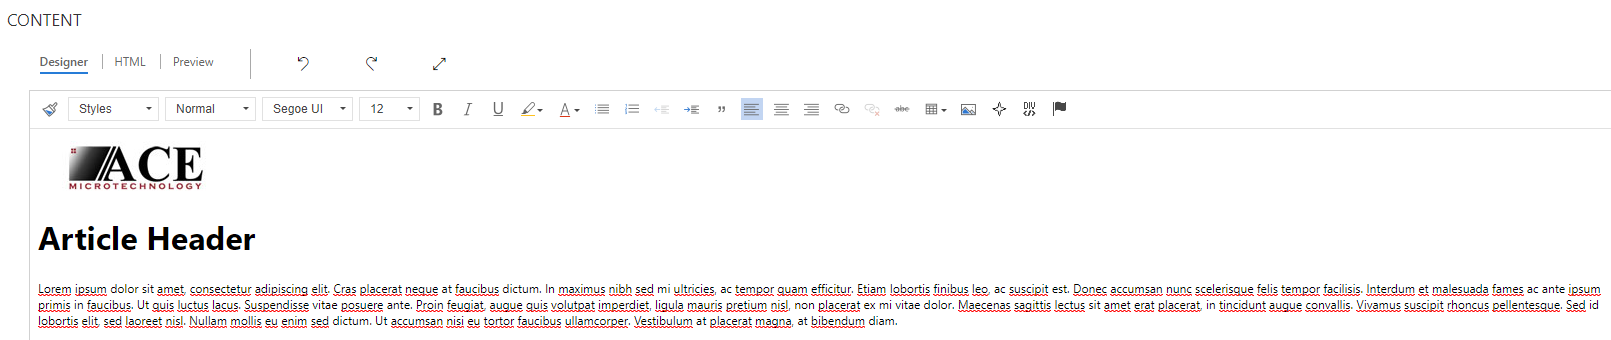
Conclusion
These highlights are by no means all the updates coming. You can check out the full list of updates coming in the Release Plans. Hopefully, though, you can use these highlights to plan for functionality you may want to use.
Keep in mind that functionality within the Early Release could change prior to the actual release to your Production environment(s). As always, test, test, and test some more. And, after testing, train the users for the changes coming.
If you still have questions on any of this, ACE Microtechnology is here to assist in your journey. Reach out to us and let us know how we can help.