User Review
( votes)
Introduction
In this blog, we have explained the Setting component of a solution and how to configure or edit the settings using the same. Earlier, this feature was not present in Power Apps, but it has been made available in the 2021 Wave 1 release. The setting component allows administrators or customizers to enable or disable any of the available features. Let us see how to set up the same.
Setup
Application administrators or customizers can create a ‘setting’ definition. They can include the setting defined in the same solution that is used to deliver the feature to their customers.
To Setup the Setting component you need to navigate to your solution and then navigate to
New-> More -> Setting -> Setting definition
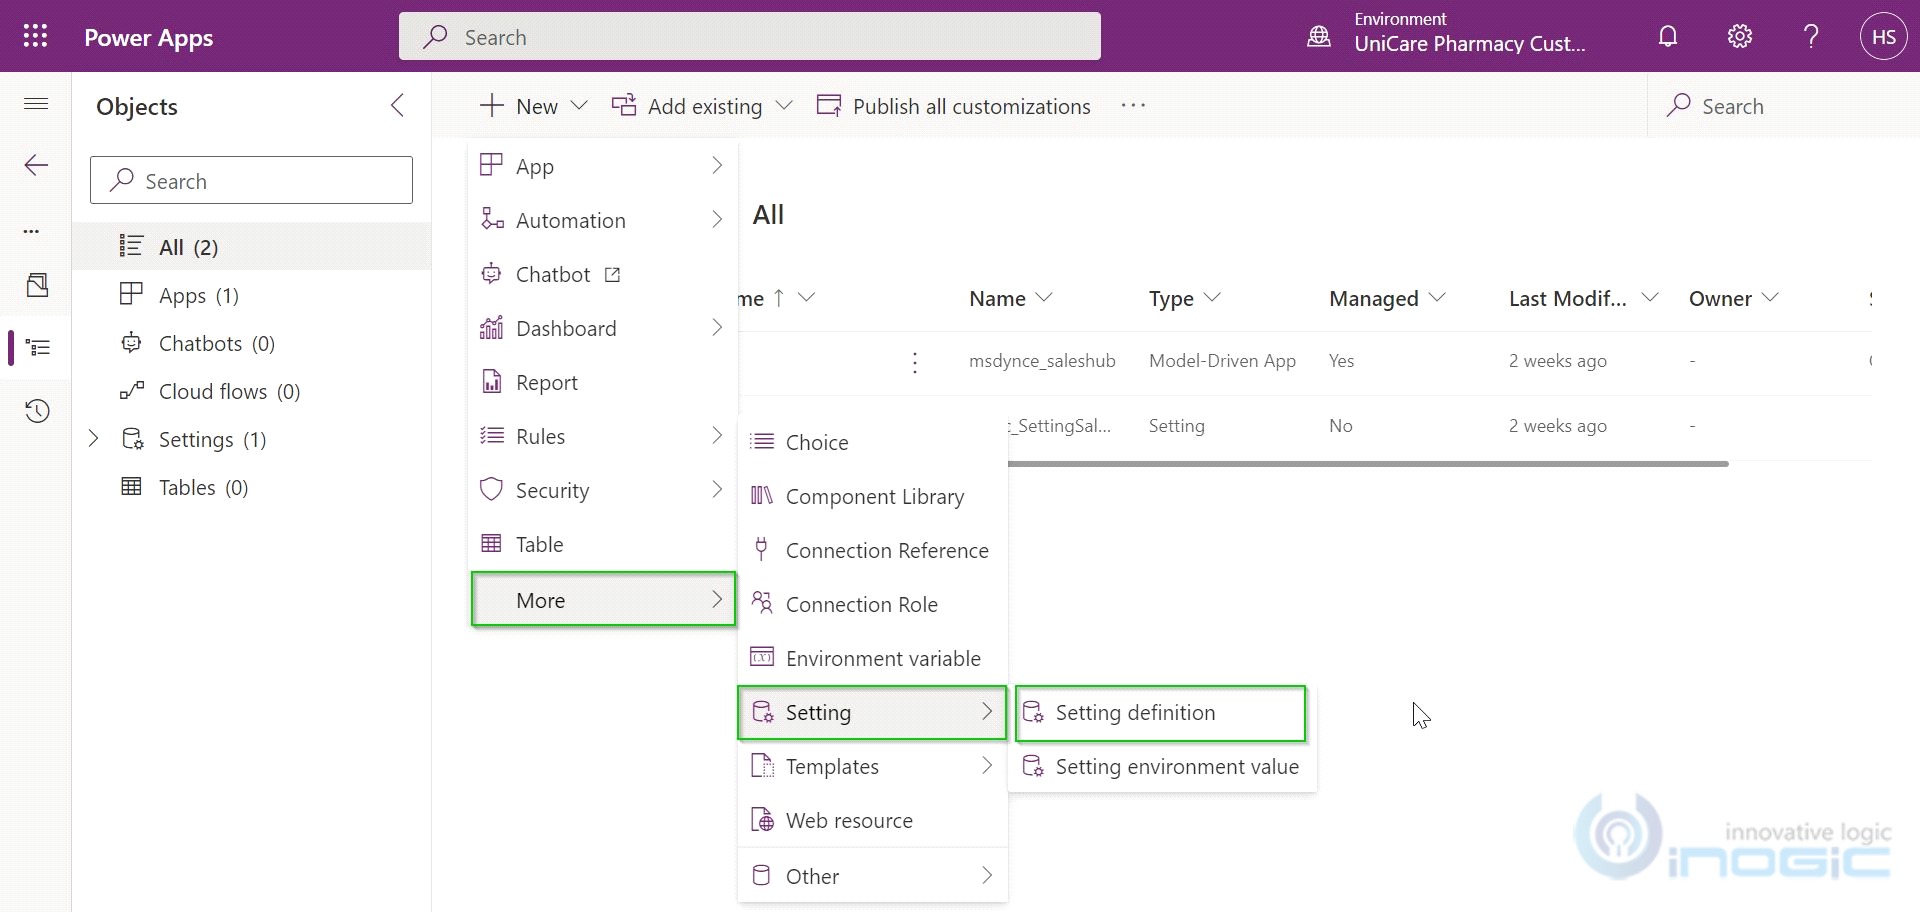
This will open a side pane where the settings can be configured with all the fields that include properties such as name, description, data type, and default value as shown below.
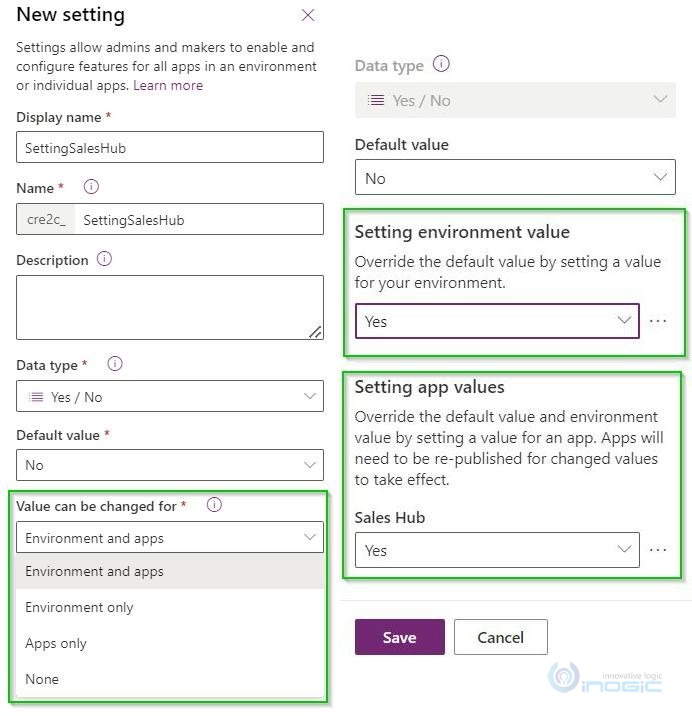
Value can be changed for:
Here, we define where to apply the ‘setting’ definition. We can either apply the setting on the Environment level or on the App level or on both. If we choose the None value then the settings shall not be applied.
Setting environment value:
Now in the property “Value can be changed for” we set if the setting shall be applied on an Environment or App or both. However, it will only be applied on the Environment level if the value of this property is set to Yes.
Setting app value:
Again, in the property “Value can be changed for” we set if the setting shall be applied on an Environment or App or both. However, it will only be applied to an App if the value of this property is set to Yes.
Also, from the above screenshot, it can be seen that if the solution on which we are defining the setting for if contains any Model Driven App(s) then that will get listed out. Where we shall set the App value to Yes or No. And the setting will get applied only on the App(s) for which we did set it to Yes.
On saving the above Setting component, a Setting Definition record gets created with the same name which can be accessed programmatically using the below fetch in both client-side as well as server-side code.
<fetch>
<entity name="settingdefinition">
<attribute name="defaultvalue" />
<attribute name="overridablelevel" />
<attribute name="isoverridable" />
<filter>
<condition attribute="uniquename" operator="eq" value="logicalname" />
</filter>
<link-entity name="organizationsetting" from="settingdefinitionid" to="settingdefinitionid" link-type="outer" alias="OrgSetting">
<attribute name="value" />
</link-entity>
</entity>
</fetch>
Now let’s see how to enable the features from Settings in the app designer.
- Navigate to Solution and then open the App on which you want to enable the feature.
- Click on Settings

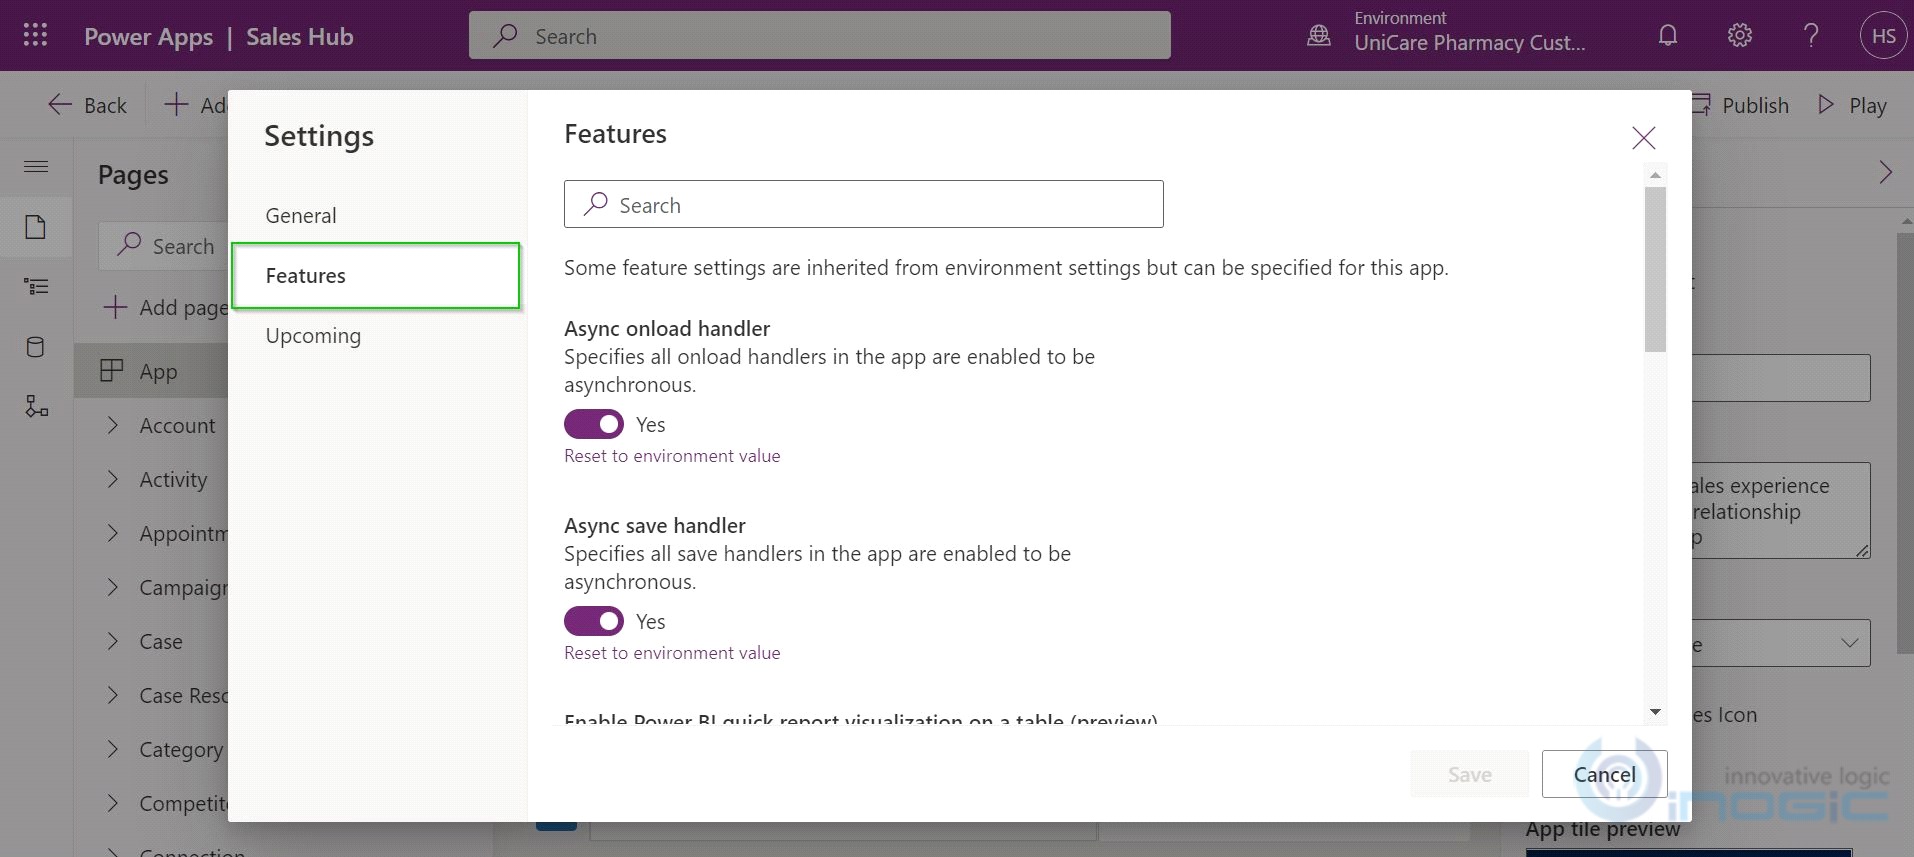
Here we can enable or disable features and they will be handled by setting the component. We can export a solution and after importing that solution into another environment the current setting value will override the default value and will apply to apps.
Features that can be managed by setting component
- Async save handler: – This feature will enable all save handler events in the app to be asynchronous.
- Async onload handler: – This feature will enable all onload handler events in the app to be asynchronous.
- Enable Power BI quick report visualization on a table (preview): – Visualize a table’s data with Power BI quick reports on the home view.
- Enable the New Email Template Editor: – This feature enables/disables the enhanced email template editor
- In-app notifications: – This feature enables the in-app notifications capability of an app to display the new notifications either as a toast notification or within the notification center.
- Native Mobile Date Time: – This feature will control native mobile devices to interact with the Date and Time fields on the form. In the mobile app, it will handle Date and time conversion on
- Native Mobile Inputs: – – This feature enables the use of mobile keyboard input on mobile clients. It Controls the format of data entered through the mobile interface.
- Offline setup from the app designer: – This feature configures your app for offline from this app designer.
- Tablet Optimization for Command Bar: – This feature is for tablets it replaces the native command bar at the bottom with the web command bar at the top.
Conclusion
Thus, we saw how to enable and disable features in the setting component and how to pass it across to other instances along with our solution.
Ps: Our favorite Community Summit is back trending with #MySummitNA – Eagerly awaiting to meet our CRM friends in person. Inogic will be at Booth #1334 at the Summit, Gaylord Palms, Orlando, FL from 10th to 13th October 2022. Do block your calendars for 12.15 pm on Oct 12th for our Partner Solution Showcase session Maps for CRM – Maplytics by our CEO at Room Coastal 7 – Convention Center, Level 2. Register now using our Promo Code INOGIC10, and avail of 10% off on your registration!