User Review
( votes)As like with every release, Microsoft brings various new features that help to improve productivity and make the user’s life easier and faster. So, here we explore one such amazing feature -Receipt Processor (AI Builder).
Before proceeding further, I would like to inform you that to use this feature you need to enable the AI builder. Also, this feature is currently in PREVIEW. Here, we must have AI Builder License enabled to use Text Recognizer in Canvas App.
Let’s create a scenario to use this feature. Consider a restaurant owner who enters all their receipt data manually in the CRM, this is a tiring and time-consuming process. So, to make the process easier and faster, they can now use the quick and automatic Receipt Processor feature. All they need to do is scan the receipt and it will automatically fill the data into the CRM without manually typing anything.
To enable this feature, we need to develop a Canvas app with the ability to scan the receipt and fill the data into CRM.
Steps to use Receipt Processor in Canvas App.
The below steps will help to store the Scanned Receipt details into CRM in one custom entity and attach the scanned receipt image in Notes as an attachment of Receipt record.
- Navigate to https://make.powerapps.com/
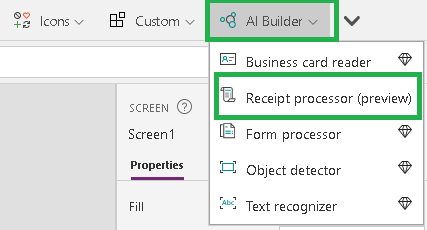
- Create a new blank Canvas app and add Receipt Processor control from AI Builder tab as highlighted below.

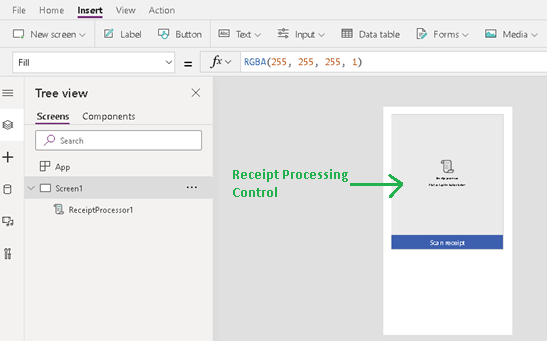
- You will see the below screen of Receipt Processing Control
- The Receipt Processing model will return the output in the following information:
4.1. MerchantName: Name of the merchant i.e. printed on the receipt.
4.2. MerchantAddress: Address printed on the receipt.
4.3. MerchantPhone: Phone Number.
4.4. TransactionDate: Date when transaction is done.
4.5. TransactionTime: Time when transaction is done.
4.6. Subtotal: Subtotal of the bill.
4.7. Tax: Tax.
4.8. Tip: Tip.
4.9. Total: Total amount of bill. Etc.Note:
• Receipt values are returned as strings.
• The file size must be less than 20 MB.
• The image format must be JPEG, PNG, or PDF.
• The image dimensions must be between 50 x 50 pixels and 10000 x 10000 pixels.
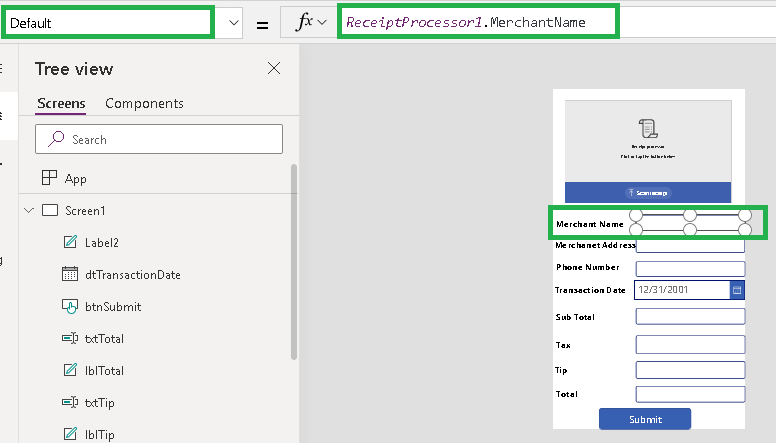
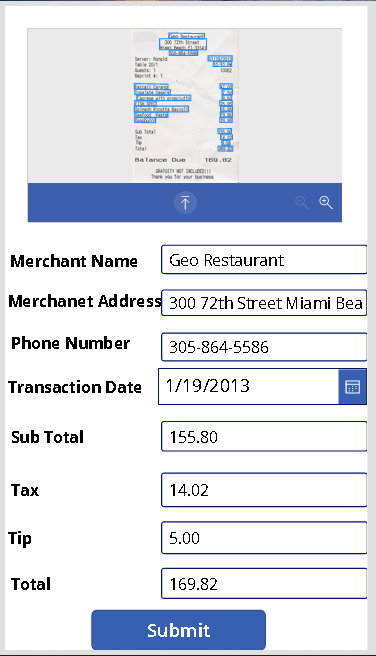
• PDF dimensions must be at most 17 x 17 inches, which is the equivalent of the Legal or A3 paper sizes or smaller. - Insert the Text Input Controls to show scanned receipt’s data to the user on the page as shown below.
- Select the textbox and set its Default property using the formula as ‘ReceiptProcessor1.MerchantName’. This formula will display the name which is printed on the receipt.
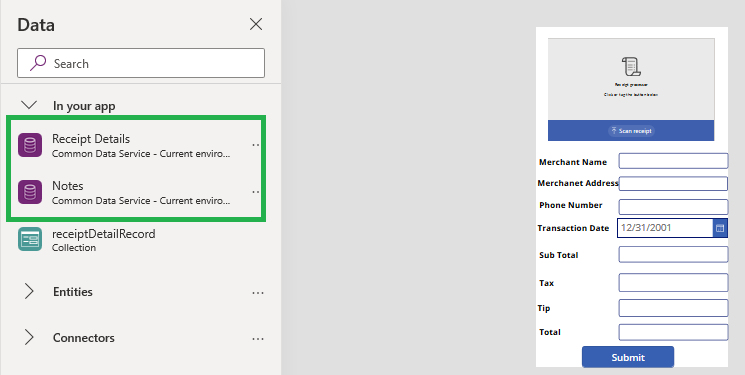
- You can display other details also like Address, Phone number, Total, Sub Total, Tax, etc. as mentioned in point #7.Here, as we said, we are going to store the scanned data into a custom entity, we have used the Receipt Details entity as shown below. Also, we’re going to attach the Receipt image as a note’s attachment in the CRM.
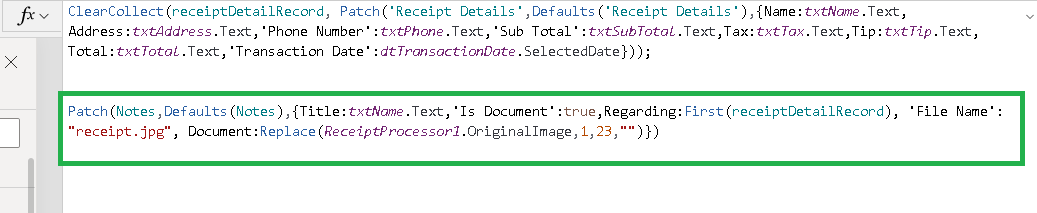
- Add the button as shown in the above screenshot and add formula onSelect property of the Submit button to create the record in CRM as shown below.Formula: Patch(‘Receipt Details’,Defaults(‘Receipt Details’),{Name:txtName.Text,Address:txtAddress.Text,’Phone Number’:txtPhone.Text,’Sub Total’:txtSubTotal.Text,Tax:txtTax.Text,Tip:txtTip.Text,Total:txtTotal.Text,’Transaction Date’:dtTransactionDate.SelectedDate});
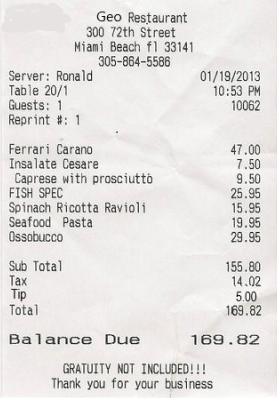
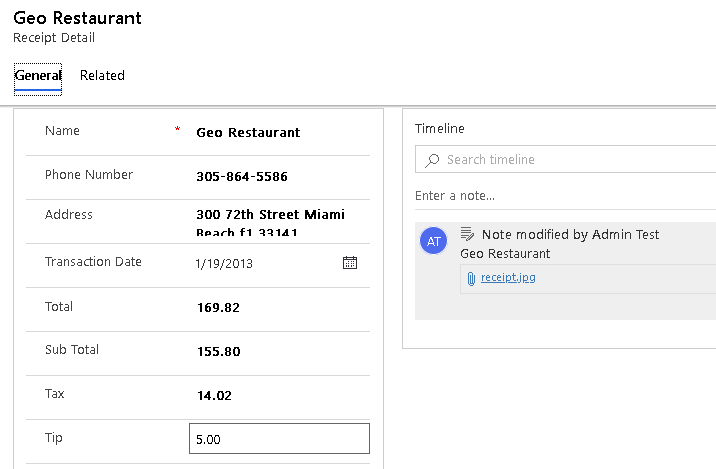
The above formula will create the record in the Receipt Detail custom entity. - To store the scanned receipt in the Note entity as an attachment, you can refer to the below formula which we have added on the same Submit button as shown below:Formula: Patch(Notes,Defaults(Notes),{Title:txtName.Text,’Is Document’:true,Regarding:First(receiptDetailRecord), ‘File Name’: “receipt.jpg”, Document:Replace(ReceiptProcessor1.OriginalImage,1,23,””)})The above formula will create a Note entity record related to Receipt Detail custom entity record.Note: To create attachments in CRM we have to pass the document body in base64 string. In the canvas app, the Receipt Processor control gives the data as base64 string of scanned receipt with the prefix “data:image/jpeg;base64,” or “data:image/png;base64,”. So while creating the annotation record in CRM we have to remove “data:image/jpeg;base64,” or “data:image/png;base64,” from the data.Below is the sample of the Receipt that we can use for scanning the details.
- After adding all the details, save the App and run. Click on the Scan Receipt button and select the receipt that you want to scan.
- It will fetch all the details of your receipt and print them on labels/textbox as shown above.
- Then click on the Submit button to create the record in CRM as shown below.


Conclusion
Now we can use Receipt Processor Control in Canvas app to scan receipts used by restaurants, gas stations, etc.